Chocolate Peanut Butter Rice Krispie Treats
As an Amazon Associate, I earn from qualifying purchases.
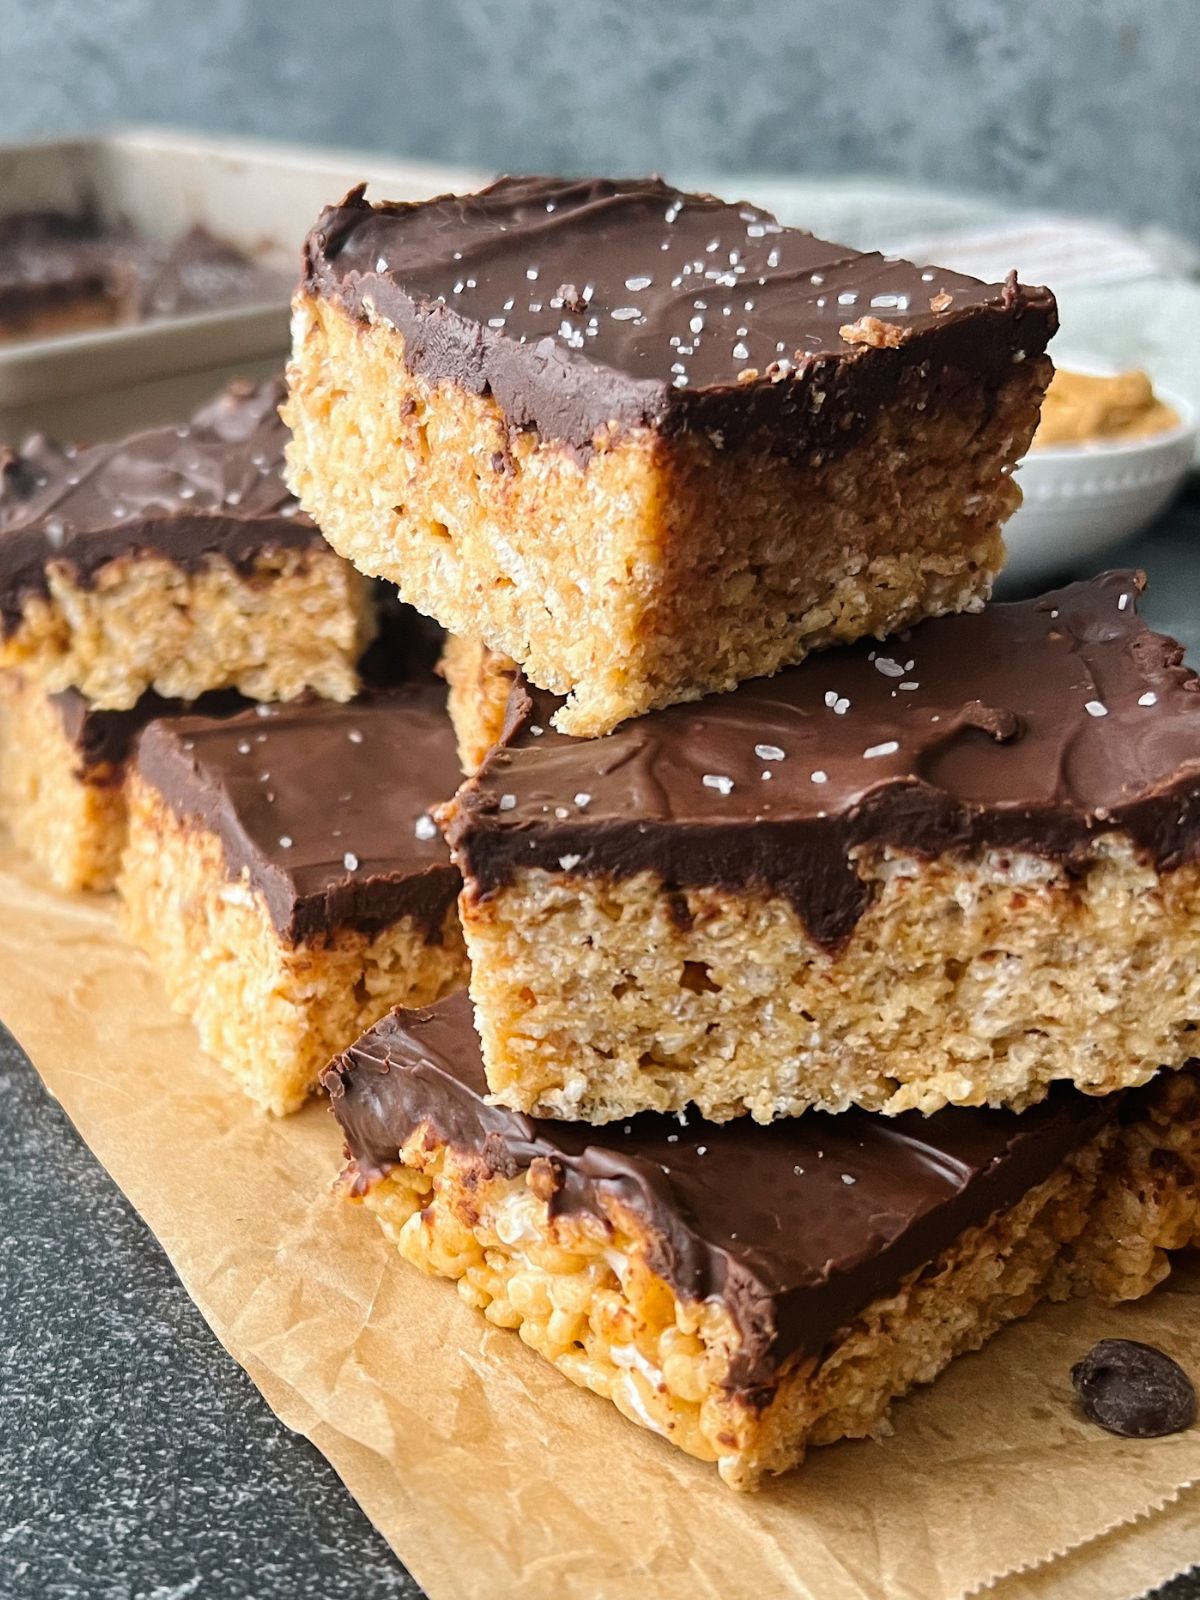
These chocolate peanut butter krispie treats are easy no-bake bars loaded with mini marshmallows and creamy peanut butter. A thick layer of chocolate made with heavy cream and semi-sweet chocolate chips takes the traditional Rice Krispie treat to a whole new level!
If you’re looking for easy no bake treats to bring to a party, holiday, or potluck celebration–these bars are the total package! They meld together beautifully on the stove top and you can pour them directly from the pot into the baking dish.
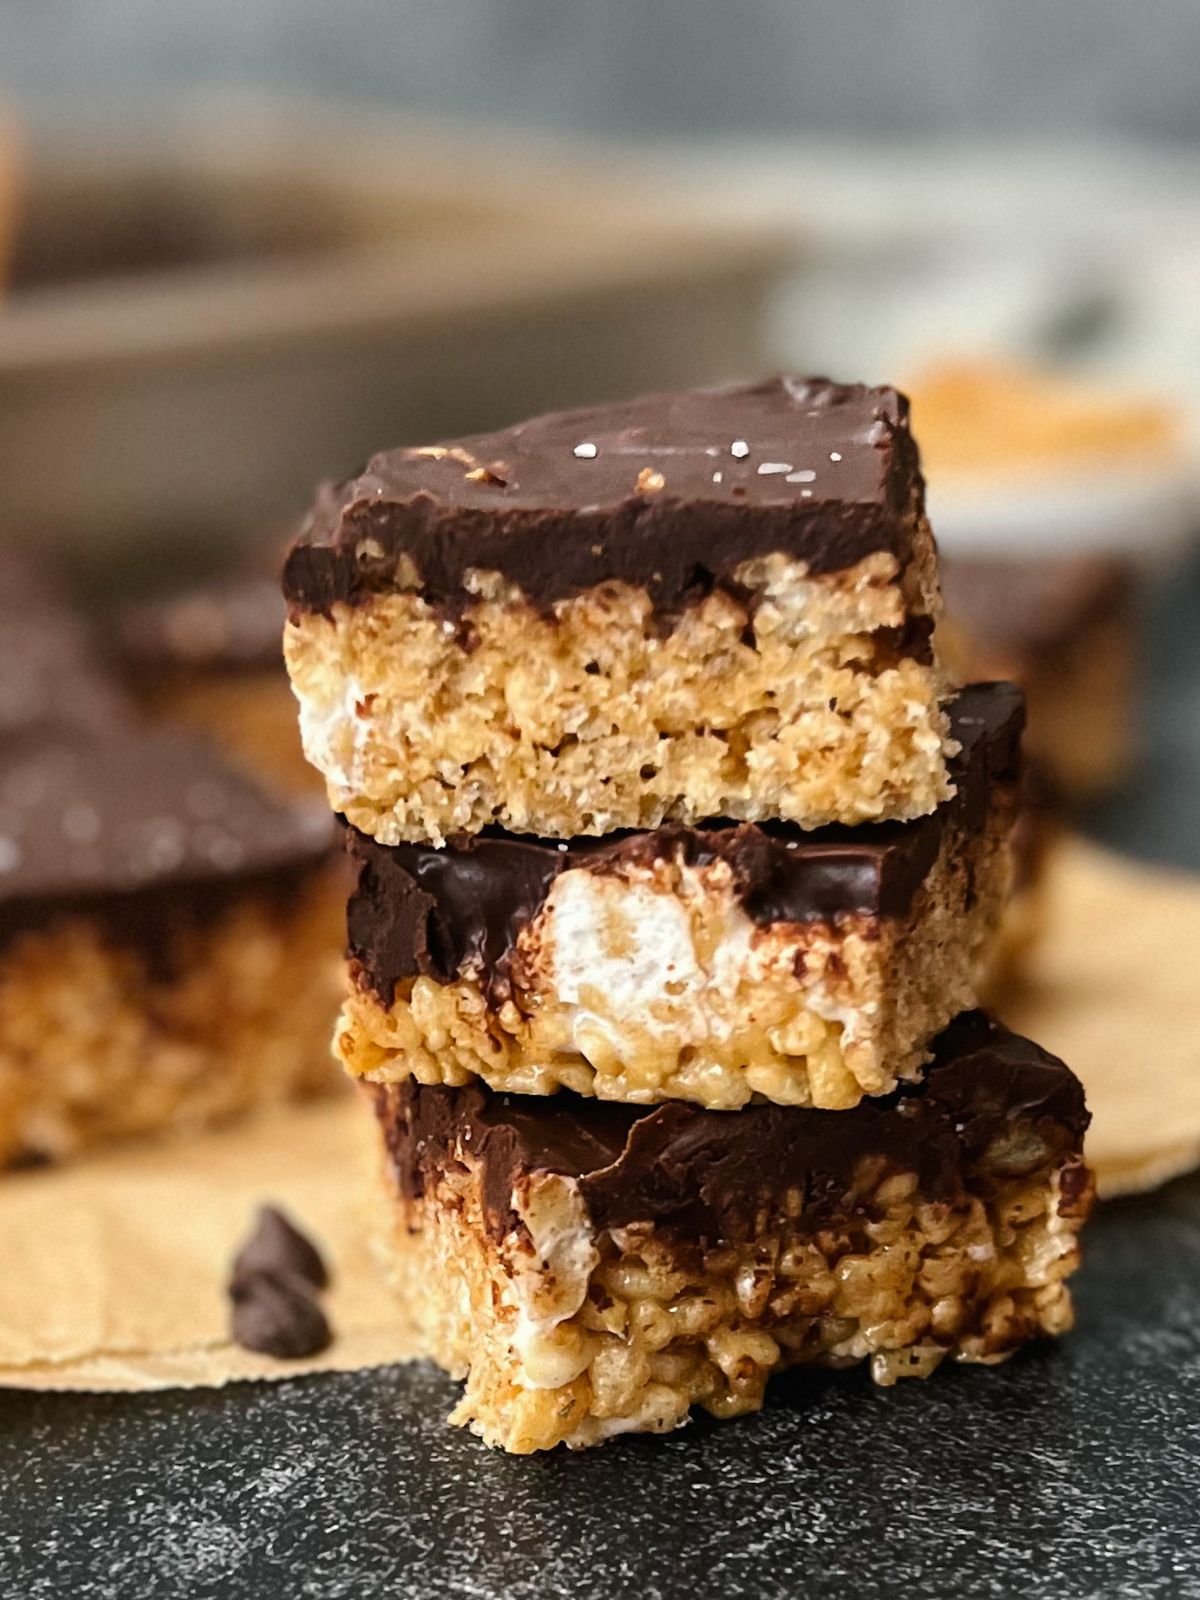
This gooey treat is loaded with marshmallows (I like to save a cup of marshmallows to pour in right at the end, so I end up with chunks of marshmallows in every bite!) and packed with creamy peanut butter flavor. They are such a fun spin on the original recipe!
Looking for more delicious chocolate treats? Check out these sourdough chocolate chip cookies, peanut butter blossoms, and Oreo chocolate chip cookies.
Why You’ll Love This Recipe
- Quick and Easy Recipe to Make – This recipe comes together quickly! No mixing bowl is required, nor any time in the oven. It takes just a few minutes to make the bars and the chocolate layer!
- Family Favorite – Everyone loves rice krispie treats and this is a heightened version of the classic!
- Suit it to Fit Your Taste Buds – If you’d rather use milk chocolate instead of semi-sweet, you can! Feel free to use chunky peanut butter if that is all you have on hand. So many ways to doctor these bars up!
- Simple Ingredients – Nothing fancy is needed here! Only a few ingredients are needed and most are kitchen staples.
Ingredients and Substitutions
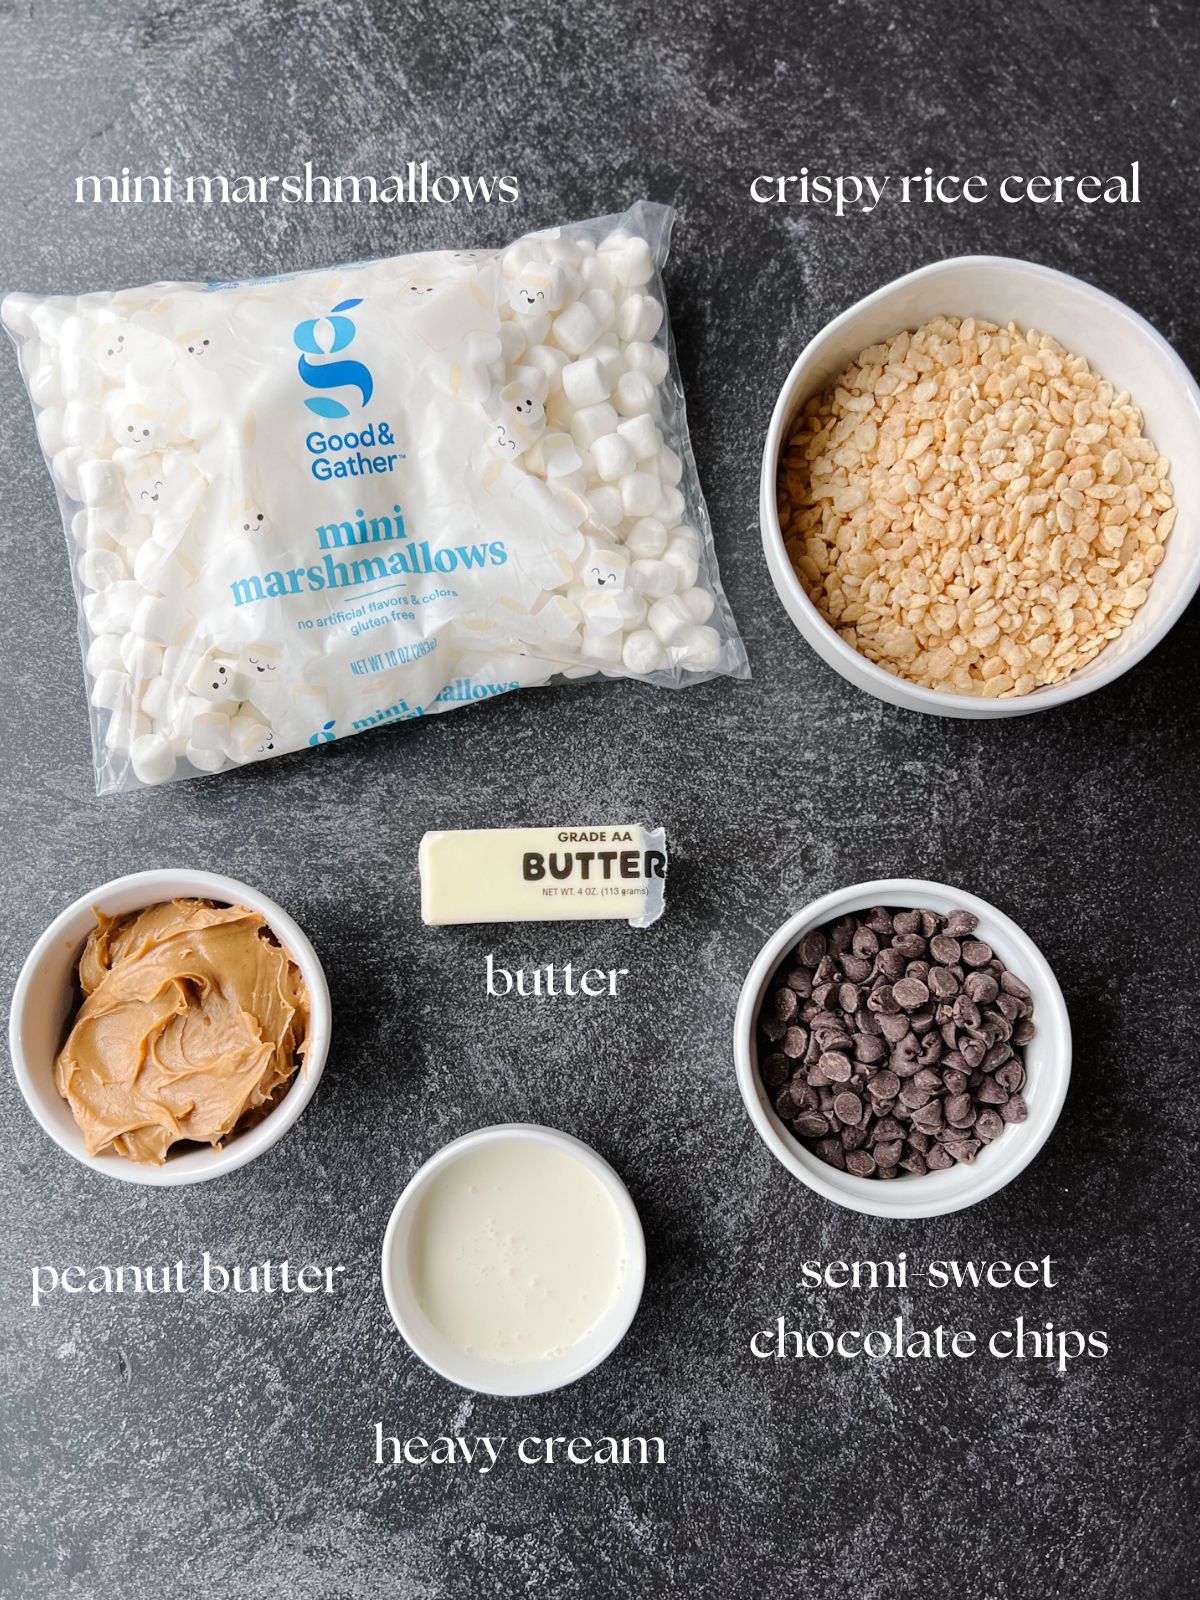
- Crispy Rice Cereal – I use the classic Rice Krispies, but any rice cereal works!
- Peanut Butter – I use creamy peanut butter. This will provide the best texture. You could use chunky peanut butter or natural peanut butter as long as you mix the oil well.
- Mini Marshmallows – I prefer to use mini marshmallows, but if all you have are jumbo marshmallows, those will work too. I save a cup to add after I’ve removed the mixture from the stove so that there are little chunks of marshmallows in the bars. You may wish to cut up the jumbo marshmallows if you want to add them at the end.
- Butter – I use salted butter in most of my baking. You can also use unsalted butter. Just add a pinch of salt to the mixture.
- Vanilla Extract – This adds so much flavor to these bars!
- Semi-Sweet Chocolate Chips – I mix these with heavy cream to make the thick melted chocolate layer on top. You could also use milk chocolate or dark chocolate. Speaking of chocolate chips, you could throw in some peanut butter chips or butterscotch chips at the end to add additional flavor.
- Heavy Cream – You could also add milk if you don’t have any heavy cream on hand. You’ll need to use half the amount of heavy cream if you are substituting milk.
See recipe card for quantities.
Step-By-Step Instructions

Step 1: Prepare a 9×9 square pan with parchment paper or coat with cooking spray. Remove one cup of mini marshmallows from the bag and set aside. Add the butter, mini marshmallows (minus one cup), vanilla extract, and peanut butter to a large saucepan over low-medium heat on the stove. Continuously stir the ingredients as they melt.

Step 2: As the ingredients are melting, pour in the crispy rice cereal and remove from heat. Mix in the remaining cup of mini marshmallows.

Step 3: Pour the marshmallow mixture into the baking pan. Use your hands or a spatula to flatten the mixture down into the pan in an even layer.
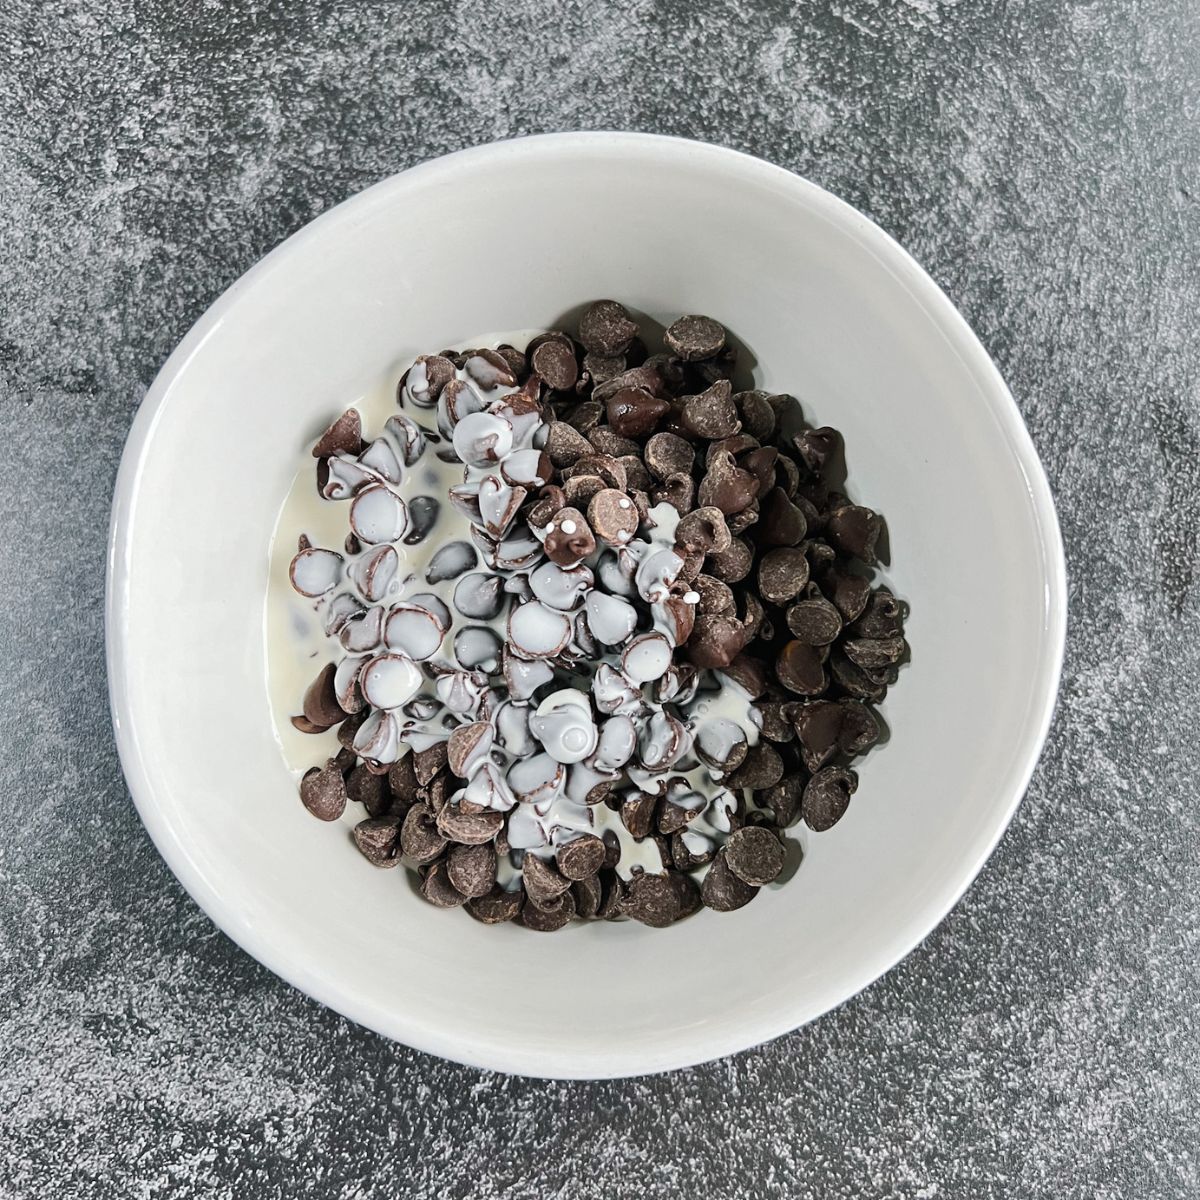
Step 4: In a microwave-safe bowl, add the chocolate chips and heavy cream. Microwave the ingredients in 30-second increments, whisking in between until the chocolate is melted.

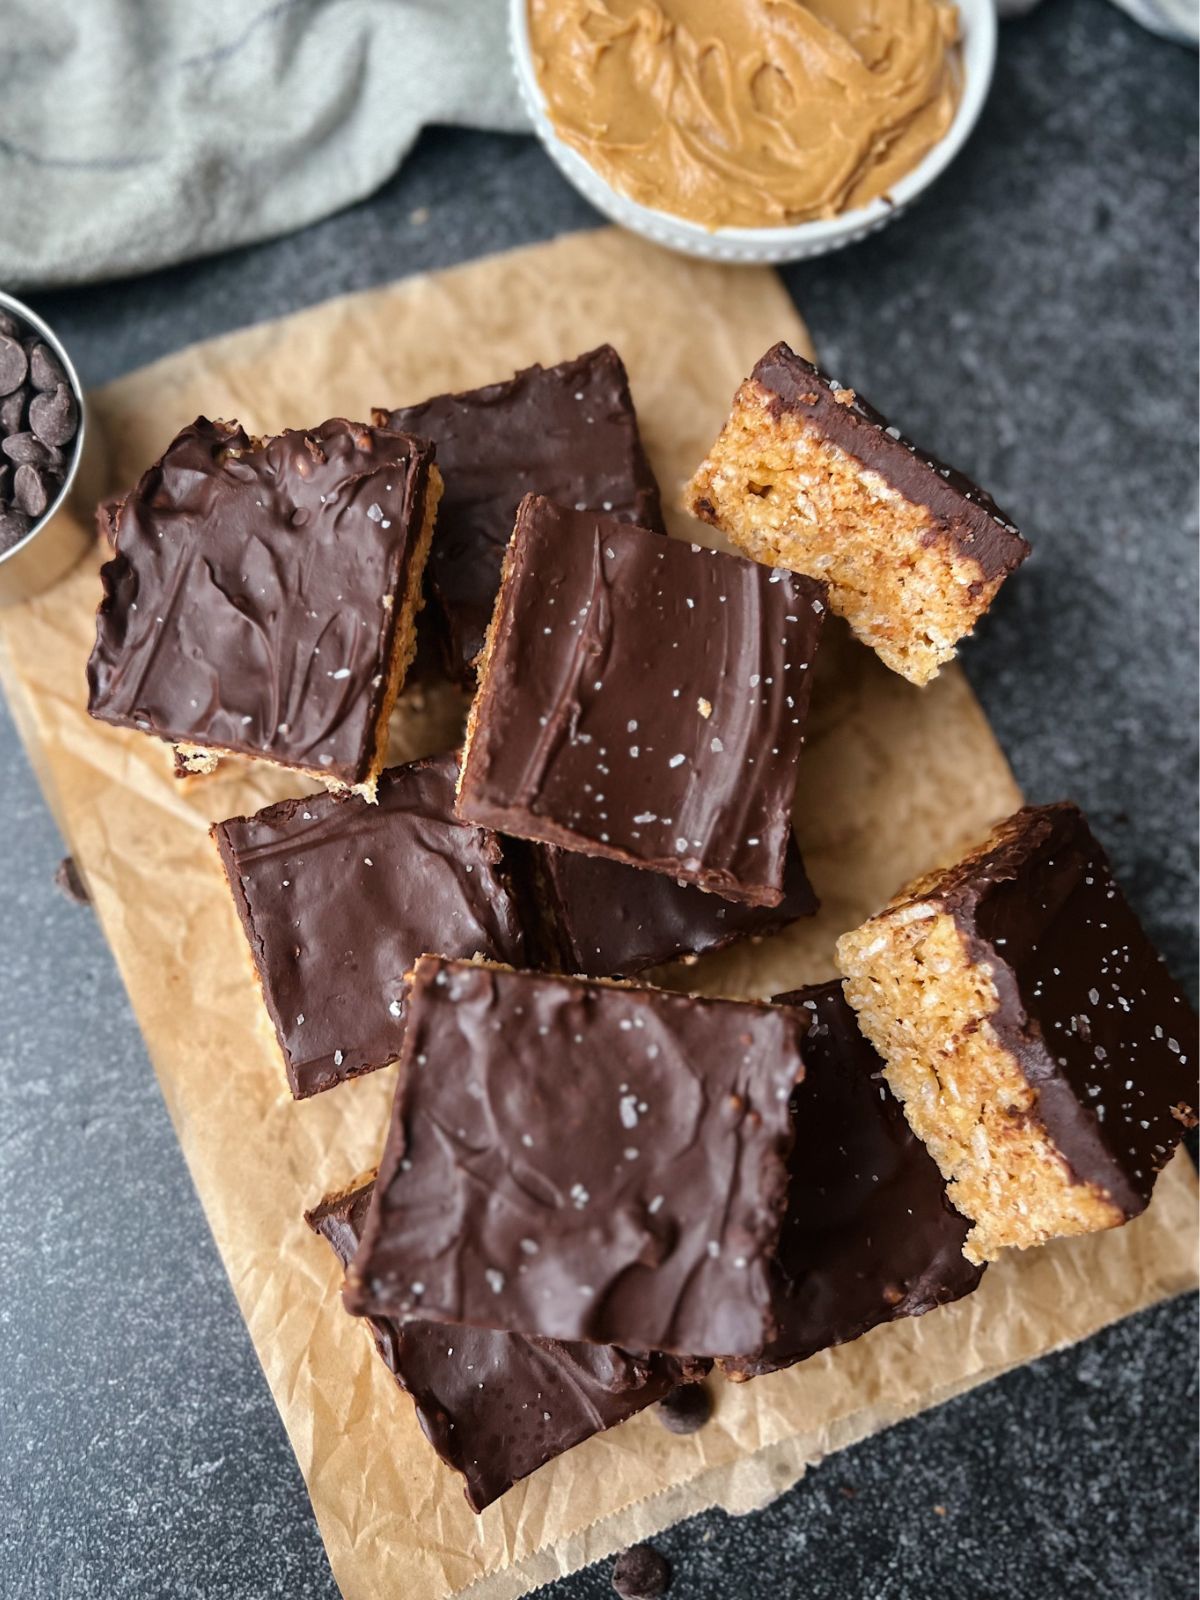
Step 5: Pour the chocolate over the rice krispie bars. Top with flaky sea salt. Allow the chocolate to harden for about an hour or two before cutting and serving the treats. You can also set the bars in the fridge for an hour to speed up the process.
Helpful Hint: If the bars stick to your hands as you press them down, wet your hands with cold water. It will prevent the bars from sticking to your fingers!

Equipment
- 9×9 Inch Pan (you can also use a 9×13, but the bars won’t be as thick)
- Large Pot or Saucepan
- Parchment Paper or Nonstick Spray
- Wooden Spoon or Rubber Spatula
Storage
Store the rice krispie treats at room temperature in an airtight container for up to 5 days.
Top Tips for Making the Best Peanut Butter Chocolate Krispie Treats
- Use fresh ingredients! Fresh marshmallows. Fresh cereal. This makes a huge difference in the taste and texture of these bars.
- Stir the krispie treat mixture constantly. The mixture can go from perfect to burnt real quick if you’re not keeping an eye on them and mixing continuously.
- Gently mix the rice cereal in. This will help you avoid crushing it.
FAQ
You can! Freeze them for up to 2 months in an airtight container, separating them by parchment paper. Allow them to thaw at room temperature before eating.
You may have overcooked the treat mixture. You need to remove it from the heat immediately once you’ve added the rice cereal.
Related
Looking for other recipes like this? Try these:

Chocolate Peanut Butter Krispie Treats
Equipment
- Wooden Spoon or other large spoon to mix ingredients
Ingredients
- 5 tablespoons salted butter
- 10 ounce bag mini marshmallows divided
- 1 teaspoon vanilla extract
- 3/4 cup creamy peanut butter
- 6 cups rice cereal Rice Krispies or store brand
- 1 1/2 cups semi-sweet chocolate chips
- 2 tablespoons heavy cream
- 1/2 teaspoon flaky sea salt optional
Instructions
- Line a 9×9 baking dish with parchment paper. Set aside.
- Remove 1 cup of marshmallows from the bag and set aside. Add the butter, marshmallows (minus 1 cup), vanilla extract, and peanut butter to a large saucepan over medium heat. Stir continuously until the ingredients melt together.
- Remove from heat and pour in the Rice Krispies and remaining 1 cup of mini marshmallows. Stir the ingredients together until the Rice Krispies are coated.
- Pour the ingredients into the prepared pan. Use your hands to firmly press down the krispie bars. If your hands are sticking to the bars, run them under cold water. This will prevent your hands from sticking to the bars.
- Next, add the chocolate chips and heavy cream to a microwave-safe bowl. Microwave the ingredients for 30 seconds. Whisk together until the chocolate is melted and it's a thick, smooth texture. If need be, microwave another 10-20 seconds. Pour the chocolate sauce over the bars using an offset spatula to spread it evenly.
- Sprinkle coarse salt on top of the bars (optional). Allow the bars to rest for 1 hour in the fridge or for 2 hours at room temperature (until the chocolate layer hardens). Then cut into squares and serve!


We loved these! Made them for a Super Bowl party. They were a hit. Good recipe.
Awesome to hear! Thank you!