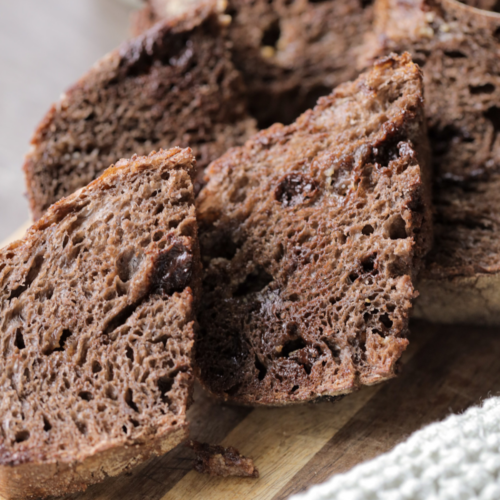
Coffee & Chocolate Sourdough Bread
This coffee and chocolate sourdough bread combines cocoa, brewed coffee, and melty white and semi-sweet chocolate chips for a deeply flavorful, artisan-style loaf. Naturally fermented with sourdough starter, it features a soft, tender crumb and crisp crust—perfect for breakfast, brunch, or a sweet treat!
Print
Pin
Servings: 10 slices
Ingredients
- 125 g active sourdough starter ½ cup
- 140 g brewed coffee cooled (⅔ cup)
- 200 g water ¾ cup + 1 tbsp
- 10 g maple syrup 2 teaspoons
- 450 g bread flour 3 ¾ cups
- 25 g cocoa powder ¼ cup
- 10 g salt 1 ½ teaspoons
- 85-90 g semi-sweet chocolate chips ½ cup
- 85-90 g white chocolate chips ½ cup
Instructions
Mix the Dough (Autolyse Phase)
- In a large bowl, combine: sourdough starter, brewed coffee (make sure it is cooled completely), water, maple syrup. Whisk until the starter is mostly dissolved.
- Next, add bread flour and cocoa powder,
- Mix using a dough whisk until no dry flour remains. The dough will be shaggy and sticky.
- Cover and let rest for 30 minutes.
- Why this matters: This rest (autolyse) hydrates the flour and begins gluten development, improving texture and structure.
Add Salt & Begin Stretch and Folds
- After 30 minutes, sprinkle the salt over the dough.
- Gently incorporate into the dough by pressing down with your fingers and folding the dough over itself.
Stretch and Fold Process (3–4 sets total)
- Perform a set about every 30 minutes:
- With wet hands, grab one side of the dough.
- Stretch it upward without tearing.
- Fold it over to the opposite side.
- Rotate the bowl ¼ turn and repeat.
- Do this 4 times per set (one full rotation).
- What you’ll notice over time:
- Dough becomes smoother and more elastic
- Less sticky and easier to handle
- Holds its shape better after each set
Bulk Fermentation (4–6 Hours)
- Once your 3-4 sets of stretch and folds are complete, cover the dough, and let it rest at room temperature.
- Signs bulk fermentation is complete:
- Dough has increased in size by about 50–75%
- Surface looks slightly domed and airy
- Small bubbles are visible throughout and along the edges
- Dough jiggles slightly when the bowl is shaken
- It feels light and aerated, not dense
- Avoid over-proofing—the dough should still have structure and not feel overly slack.
Shaping the Dough
- Turn the dough out onto a lightly floured surface (use rice flour).
- Gently stretch it into a large rectangle.
Add Chocolate Chips and Fold:
- Sprinkle just over half of the chocolate chips evenly across the dough.
- Fold one side of the dough toward the center.
- Fold the opposite side over (like a letter).
- Add the remaining chocolate chips on top.
Final Shape:
- Roll the dough into a loaf.
- Pinch seams along the sides and bottom to seal.
Build Surface Tension:
- Using your hands, gently push and pull the dough toward you on the counter.
- Rotate and repeat until the surface is slightly taut.
- Important: Be gentle—pressing too hard can cause chocolate chips to tear through the dough.
Cold Fermentation
- Transfer the dough seam-side up into a rice flour-dusted banneton.
- Cover and refrigerate for 8–24 hours.
- This slow fermentation enhances flavor and improves texture.
Bake
- Preheat your Dutch oven to 450°F (232°C) by placing it in the oven for 30-60 minutes before adding the loaf.
- After those 30-60 minutes, turn the dough out onto parchment paper (I use both parchment paper and a bread sling when baking with inclusions to prevent the underside getting too dark). Score the top with bread lame or sharp blade.
- Transfer into the hot Dutch oven and bake covered for 30 minutes. Then remove the lid and bake uncovered for another 15-20 minutes or until the internal temperature reaches 205°F (96°C).
Cool
- Remove from Dutch oven and let cool completely before slicing.
Notes
Storage:
- Room Temperature (Best for 2–3 days):
- Allow the bread to cool completely before storing.
- Store in a paper bag, bread box, or loosely wrapped in a clean kitchen towel.
- For slightly longer freshness, place in a plastic bag or airtight container after the first day to prevent excessive drying.
- Refrigeration (Not recommended):
- Avoid storing in the fridge, as it will dry out the crumb and make the bread stale more quickly.
- Freezing (Best for long-term storage):
- Slice the bread once fully cooled.
- Place slices or the whole loaf in a freezer-safe bag or wrap tightly in plastic wrap and foil.
- Freeze for up to 2–3 months.
- To Reheat:
- From room temp: toast slices or warm in a 350°F (175°C) oven for 5–10 minutes.
- From frozen: toast directly or thaw at room temperature before warming.
- Tip:
- Because of the chocolate and cocoa, this bread stays softer slightly longer than traditional sourdough, but sealing it too tightly too soon can soften the crust.
Nutrition
Serving: 1slice | Calories: 277kcal | Carbohydrates: 47g | Protein: 7g | Fat: 7g | Saturated Fat: 4g | Polyunsaturated Fat: 1g | Monounsaturated Fat: 2g | Trans Fat: 0.01g | Cholesterol: 2mg | Sodium: 399mg | Potassium: 165mg | Fiber: 3g | Sugar: 9g | Vitamin A: 8IU | Vitamin C: 0.04mg | Calcium: 34mg | Iron: 1mg
Calories: 277kcal
Tried this recipe?Mention @Bake.With.Jamie