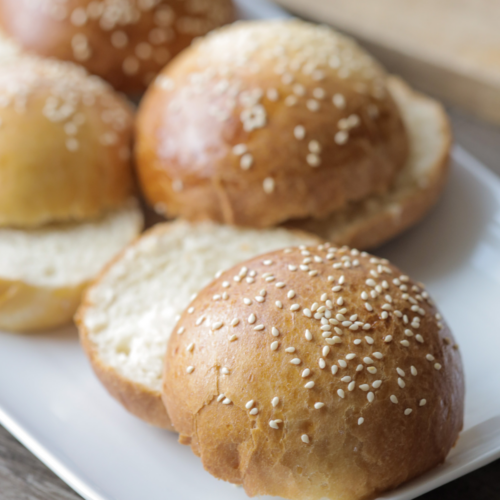
Sourdough Brioche Burger Buns
Soft, buttery sourdough brioche burger buns made with active sourdough starter for rich flavor and a light, fluffy texture. These homemade brioche buns are perfect for burgers, sandwiches, and meal prep, with a golden crust and tender crumb!
Print
Pin
Servings: 9 buns
Ingredients
- 160 g active sourdough starter 2/3 cup
- 120 g warm milk 1/2 cup, temperature should be slightly warm to the touch, but not hot
- 390 g bread flour (recommended) or all-purpose flour 3 1/4 cups
- 2 large eggs room temperature
- 3 g salt 1/2 teaspoon
- 50 g granulated sugar 1/4 cup
- 113 g salted butter softened (8 tablespoons)
For the egg wash:
- 1 large egg whisked
- sesame seeds optional, to sprinkle over the top of buns before baking
Instructions
Mix the dough
- In the bowl of a stand mixer fitted with a dough hook, add the sourdough starter, warm milk, flour, eggs, salt, and sugar.
- Mix on low to medium speed until a shaggy dough forms.
- Stop the mixer as needed and use a rubber spatula to scrape down the sides and bottom of the bowl to ensure all ingredients are evenly incorporated.
- The dough will look rough and slightly sticky at this stage—this is normal.
Incorporate the butter
- With the mixer running on medium speed, add the softened butter one tablespoon at a time.
- Allow each piece of butter to fully incorporate into the dough before adding the next.
- This gradual addition is important to properly develop the dough and create a soft, enriched texture.
- The dough may look slightly greasy or separated during this step but will come back together as mixing continues.
Knead the dough
- Increase the mixer speed to medium-high (I tend to keep it high) and knead for about 5-7 minutes.
- The dough should become smooth, elastic, and slightly tacky but not overly sticky.
- It should begin to pull away from the sides of the bowl and pass a windowpane test (you can stretch a small piece thin enough to see light through without tearing).
Bulk fermentation
- Transfer the dough to a lightly greased bowl and cover with plastic wrap or a damp towel.
- Let the dough ferment at room temperature for 4–6 hours.
- During this time, the dough should rise by about 50–70%, not necessarily double.
- For added strength and improved structure, perform 1–2 sets of stretch and folds during fermentation:
- Gently pull one side of the dough up and fold it over itself.
- Rotate the bowl and repeat on all sides.
- Cover and continue fermenting.
Cold fermentation
- Once the dough has partially risen, cover it tightly and transfer to the refrigerator.
- Allow the dough to cold ferment overnight (8–16 hours).
- This step enhances the flavor and firms up the dough, making it much easier to shape the next day.
Divide and shape
- Remove the dough from the refrigerator and turn it out onto a lightly floured surface.
- Divide the dough evenly into 9 portions, approximately 100–105 g each.
- To shape:
- Take each piece of dough and gently flatten it slightly.
- Pinch the edges toward the center to create a seam.
- Flip the dough seam-side down.
- Cup your hand around the dough and roll it against the work surface to create a tight, smooth ball.
- Proper shaping is key to achieving tall, round buns with a soft, even crumb.
Second rise (proofing)
- Place the shaped dough balls onto two parchment-lined baking sheets, spacing them evenly apart.
- Arrange 5 buns on one sheet and 4 on another for proper airflow.
- Lightly grease a piece of plastic wrap and cover the buns loosely.
- Let them rise at room temperature for 1–4 hours.
- The buns should become visibly puffy and airy but do not need to fully double in size.
- When gently pressed, the dough should slowly spring back, leaving a slight indentation.
Preheat and prepare for baking
- Preheat your oven to 350°F (175°C).
- In a small bowl, whisk the egg to create the egg wash.
- Gently brush the tops of the buns with the egg wash, being careful not to deflate them.
- Sprinkle with sesame seeds if desired.
Bake
- Place one baking sheet on the second rack from the top and the other on the fourth rack.
- Bake for 22–25 minutes, or until the buns are deep golden brown.
- Halfway through baking, switch the positions of the pans to ensure even browning.
- The buns are done when they reach an internal temperature of 200-205°F (96°C).
Finish and cool
- Remove the buns from the oven.
- Transfer to a wire rack and allow them to cool completely before slicing.
Notes
Storage
- Store completely cooled buns in an airtight container or sealed bag at room temperature for up to 3 days.
- For best texture, keep them in a cool, dry place and avoid refrigerating, as this can dry them out.
- To freeze, place buns in a freezer-safe bag or container and freeze for up to 2 months.
- Thaw at room temperature or gently warm in the oven at 150°C (300°F) until soft.
- For a fresh-from-the-oven feel, lightly toast or warm before serving.
Nutrition
Serving: 1bun | Calories: 317kcal | Carbohydrates: 43g | Protein: 8g | Fat: 13g | Saturated Fat: 7g | Polyunsaturated Fat: 1g | Monounsaturated Fat: 3g | Trans Fat: 0.4g | Cholesterol: 91mg | Sodium: 240mg | Potassium: 93mg | Fiber: 1g | Sugar: 6g | Vitamin A: 426IU | Calcium: 35mg | Iron: 2mg
Calories: 317kcal
Tried this recipe?Mention @Bake.With.Jamie