Sourdough Brioche Burger Buns
As an Amazon Associate, I earn from qualifying purchases.
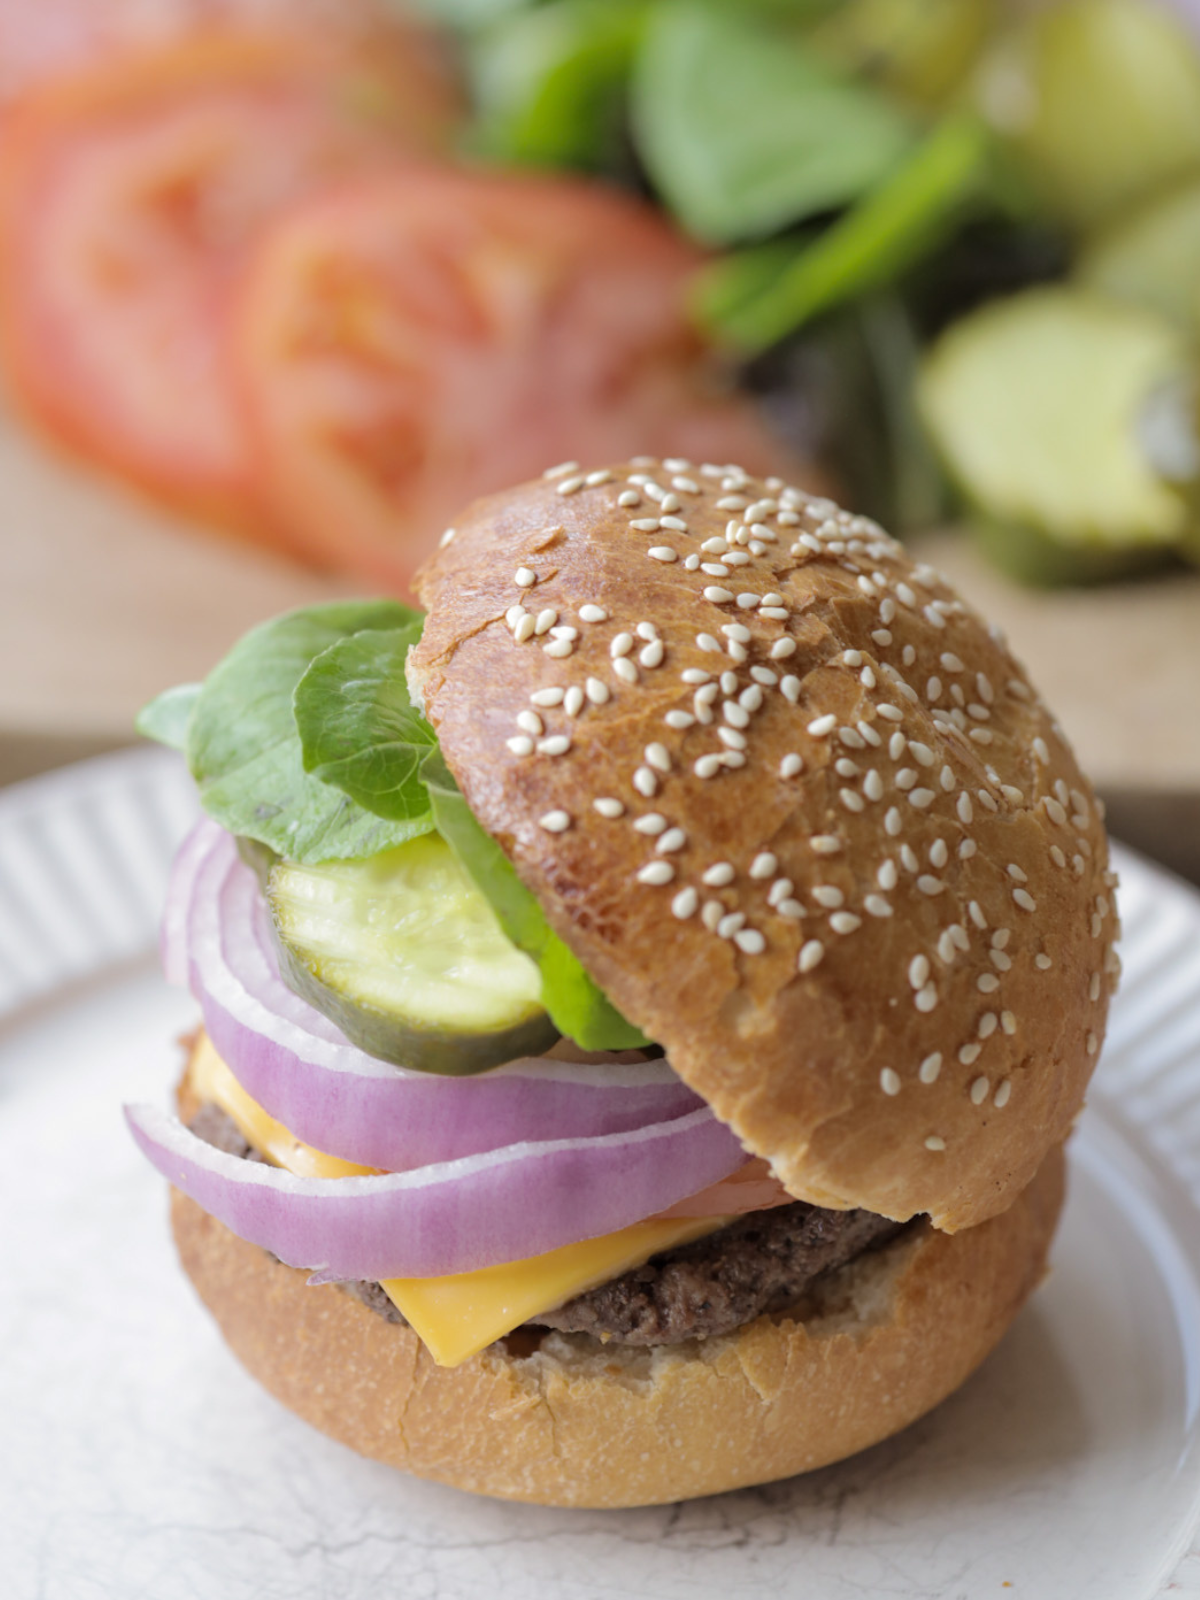
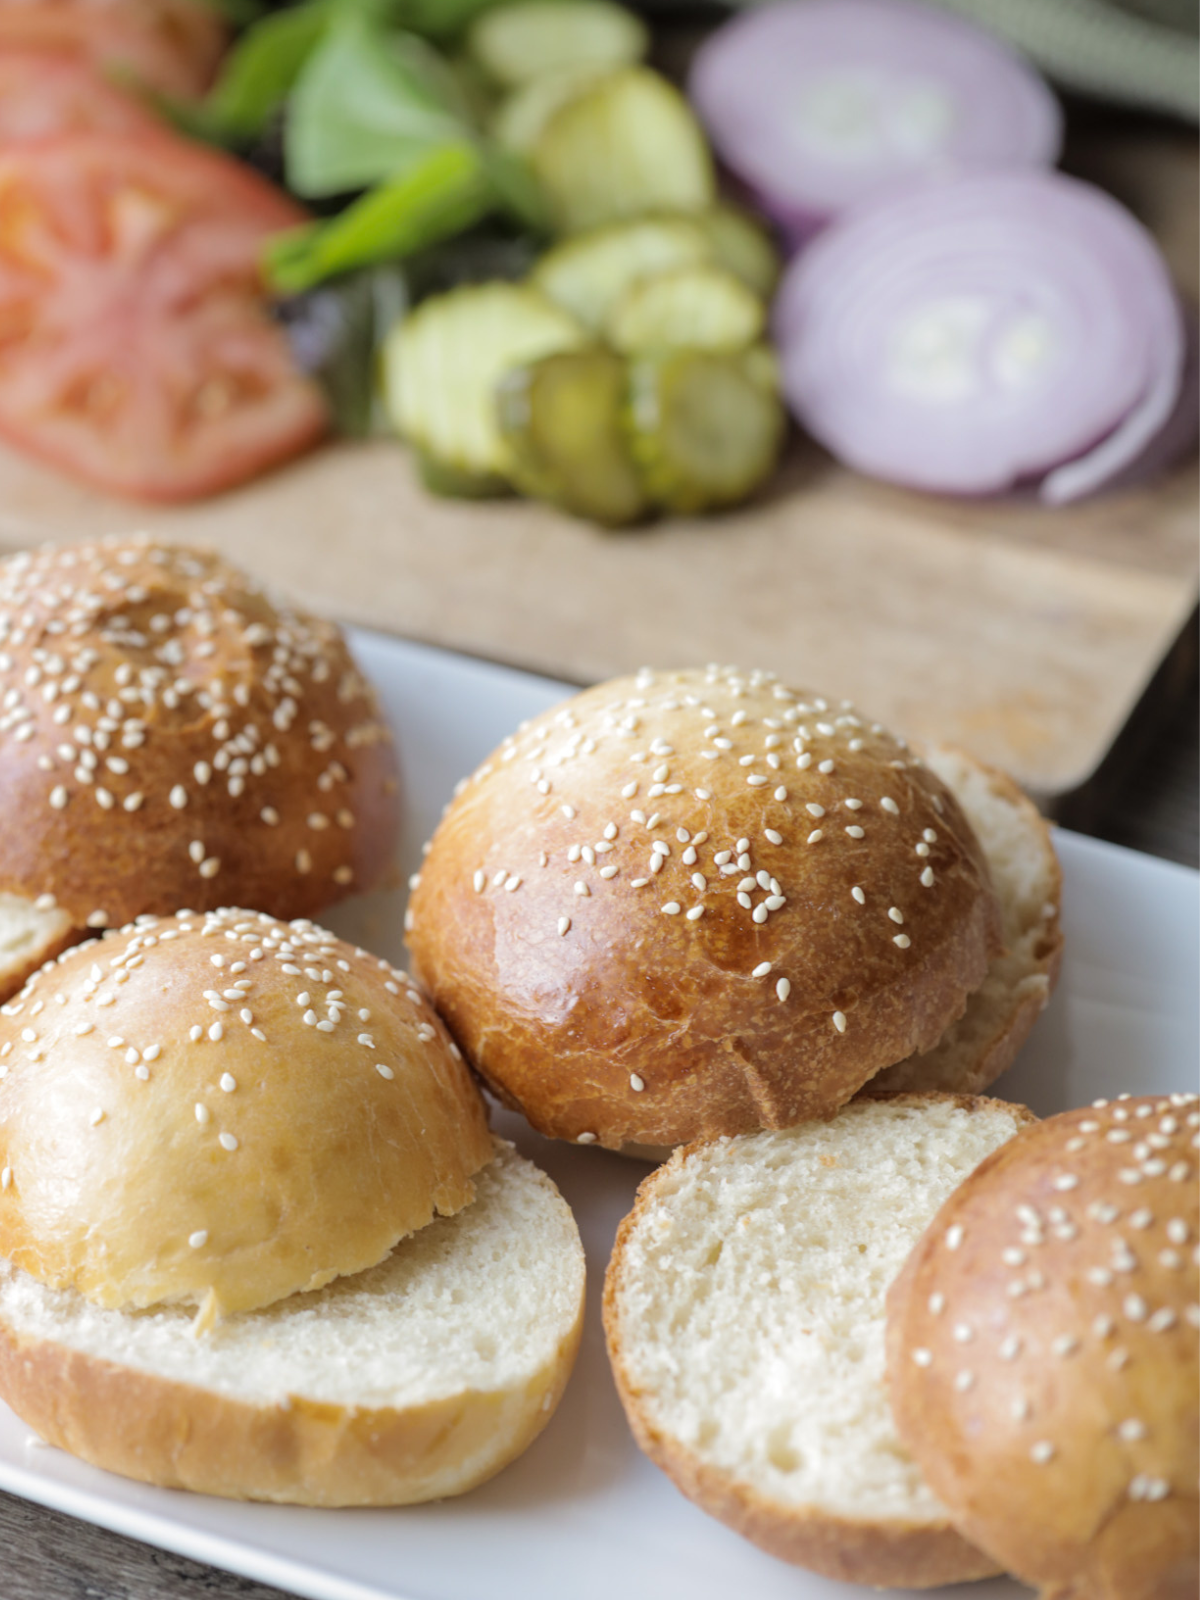
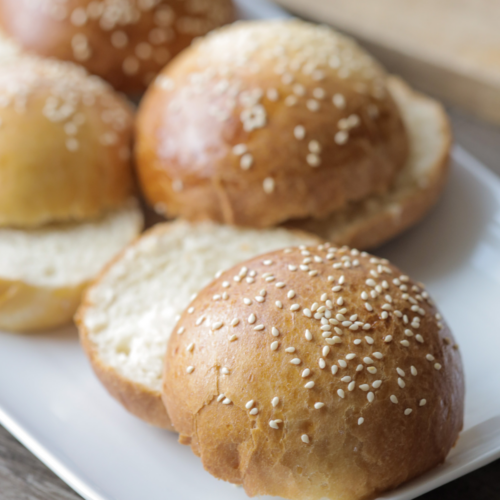
These sourdough brioche burger buns are naturally fermented (no yeast here), incredibly soft, and perfect for grilling season! Add your favorite fixings to your burger or turn these sourdough buns into sandwiches–perfect for beach days.
Grilling season is my favorite. The birds are singing, the sun shines again, and my husband gets to be in his element, grilling his favorite food. I don’t touch the grill. Never say never, but I prefer the kitchen. 🙂
With that said, I will supply all the fixings and utensils, and you better believe I’m making these sourdough brioche burger buns on repeat this summer! And check out my sourdough hot dog bun recipe if you haven’t yet!
Brioche dough is known to be soft thanks to the eggs, milk, and butter. That, combined with the natural leavening of active sourdough starter, and you have the *best* burger buns! No active yeast needed (just a little bit of planning ahead of time).
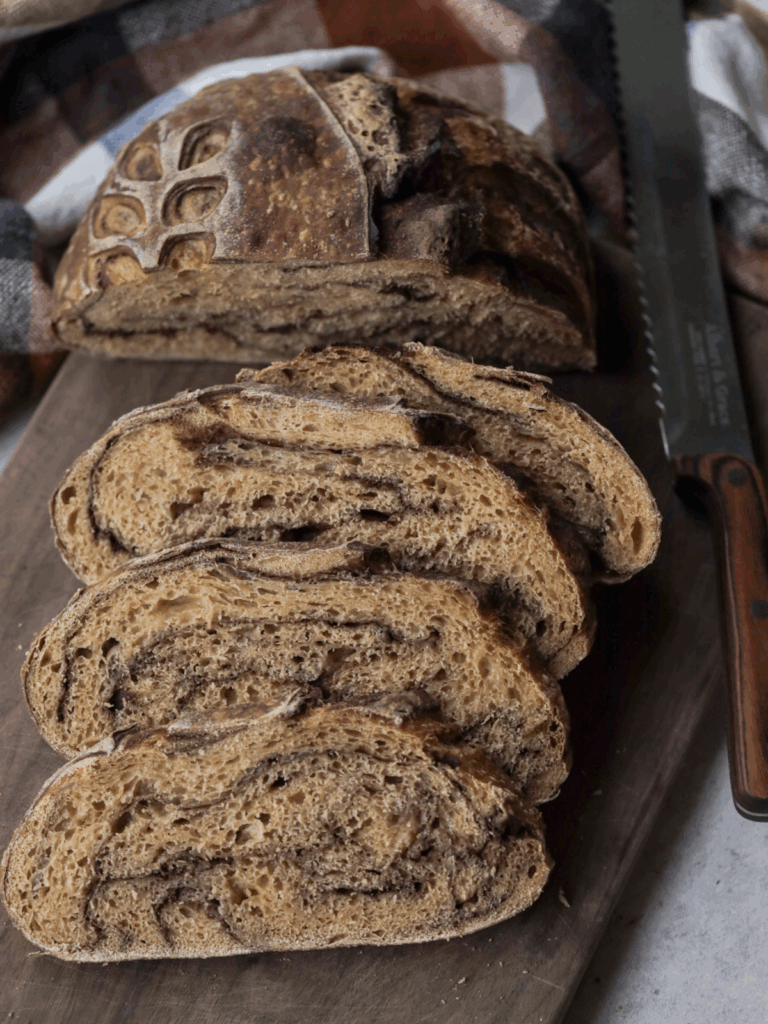
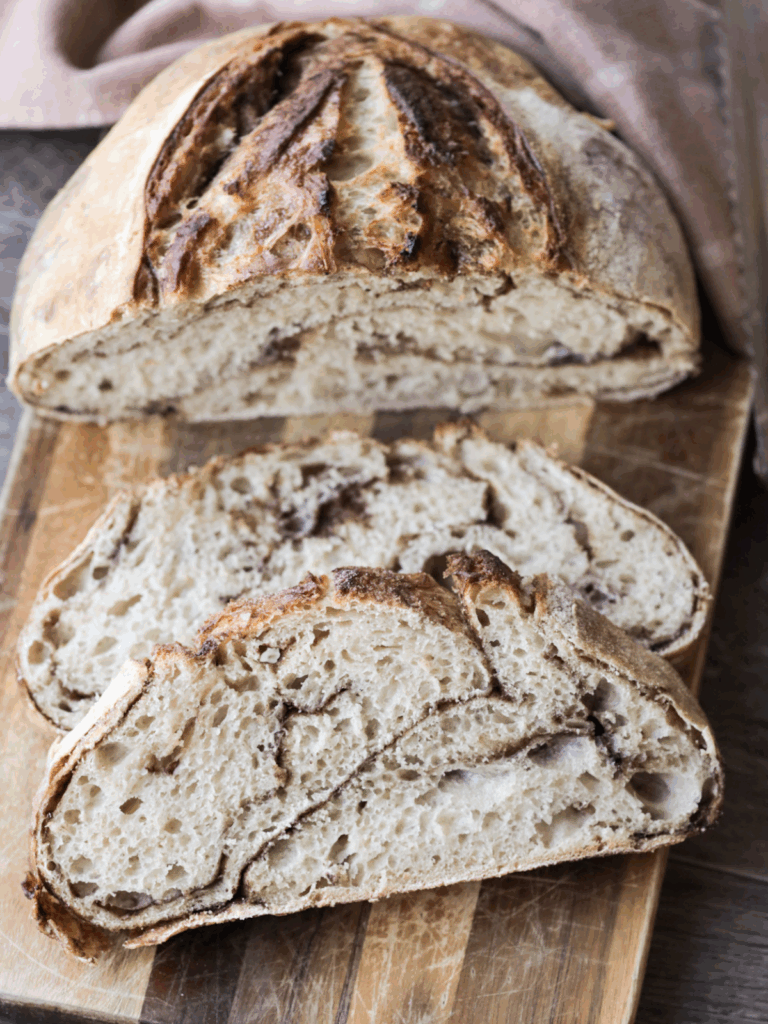
Looking for more sourdough brioche recipes? Check these out!
Ingredients
- Active sourdough starter – this recipe relies on a bubbly and active sourdough starter to create the beautiful rise in this dough.
- Warm milk (warmed to 27–32°C / 80–90°F) – If you want to prolong bulk fermentation (I’ll sometimes do this if I make the dough before bed), you can use cold milk instead. Warm ingredients will speed up the fermentation process.
- All-purpose flour or bread flour – I highly recommend bread flour here, but if you only have all-purpose flour, that will work too.
- Large eggs, room temperature – Again, if you wish to prolong fermentation, cold eggs work well here too!
- Salt
- Granulated sugar – This provides a softer crumb and aids in the fermentation process.
- Salted butter, softened – I always use salted butter. If you only have unsalted butter, simply add 1/4 teaspoon of salt to the dough (1-2 grams).
- Egg for egg wash – whisk the eggs together to brush over the tops of the buns before baking. You can also add a splash of heavy cream or milk to this if you’d like!
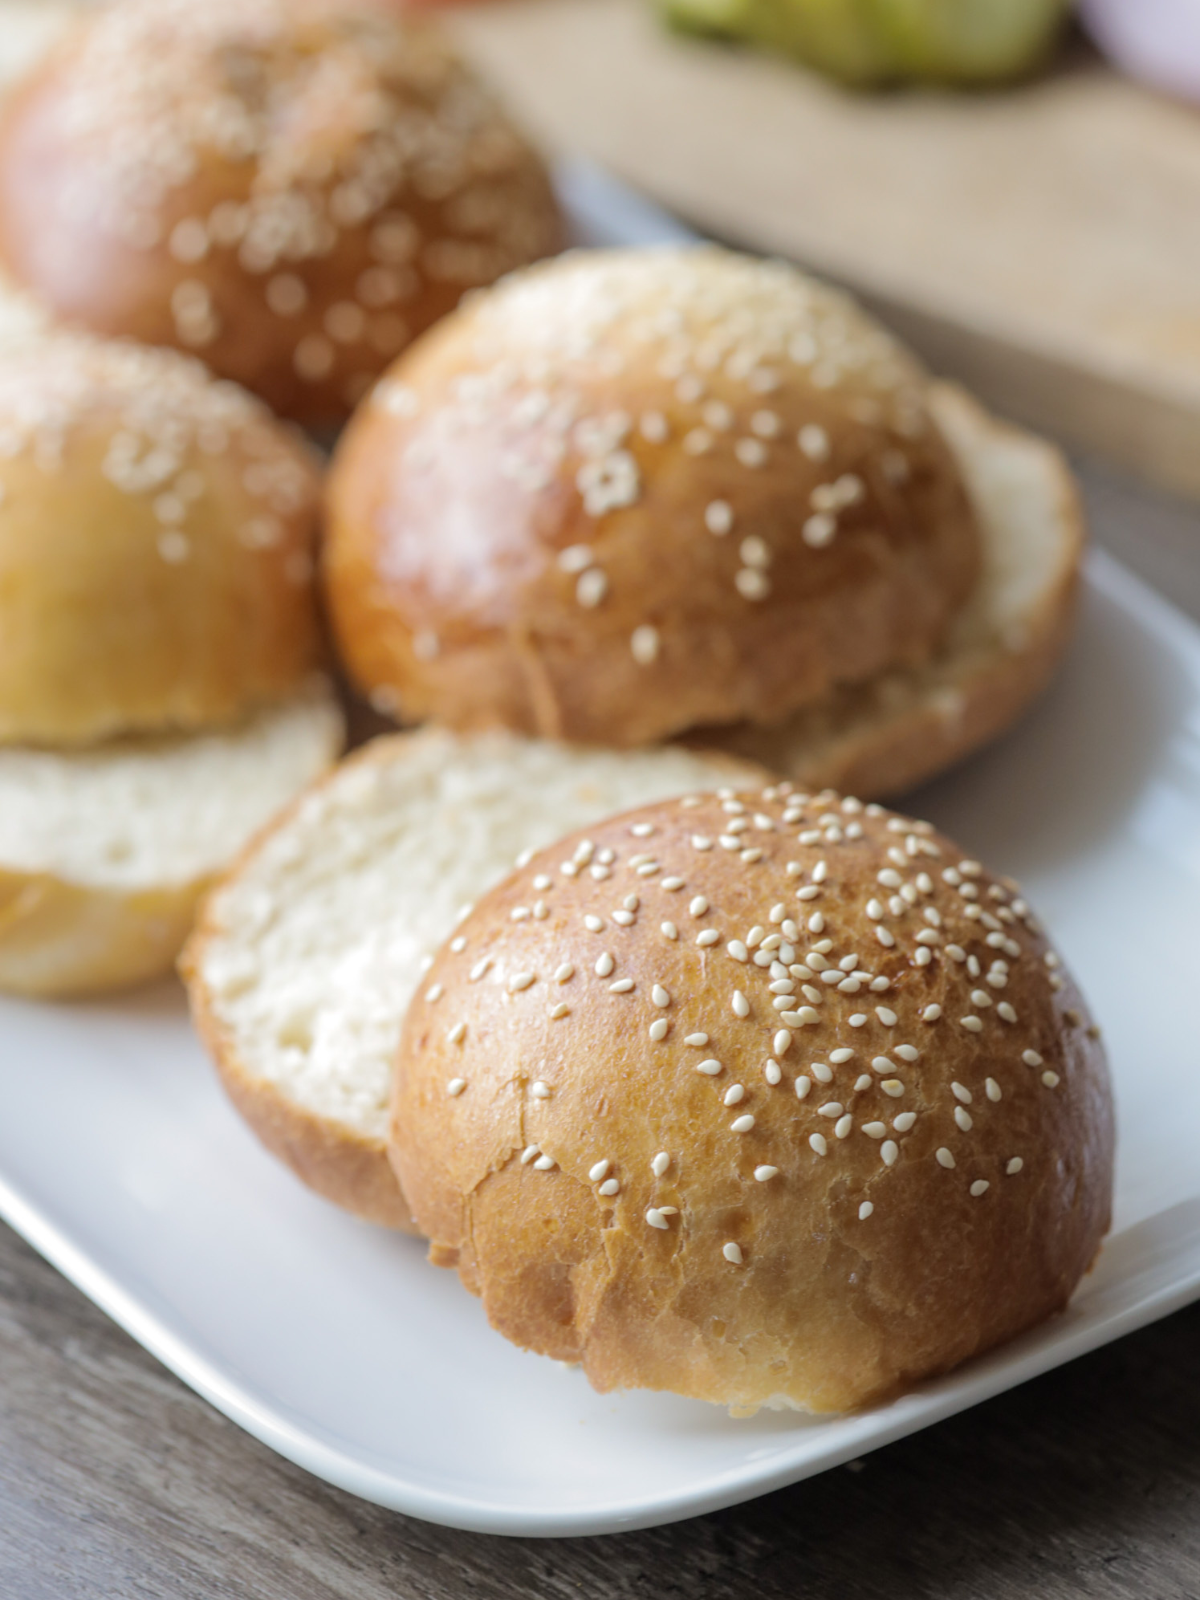
- Sesame seeds – these give the classic burger bun look, but they are optional!
Step-By-Step Instructions
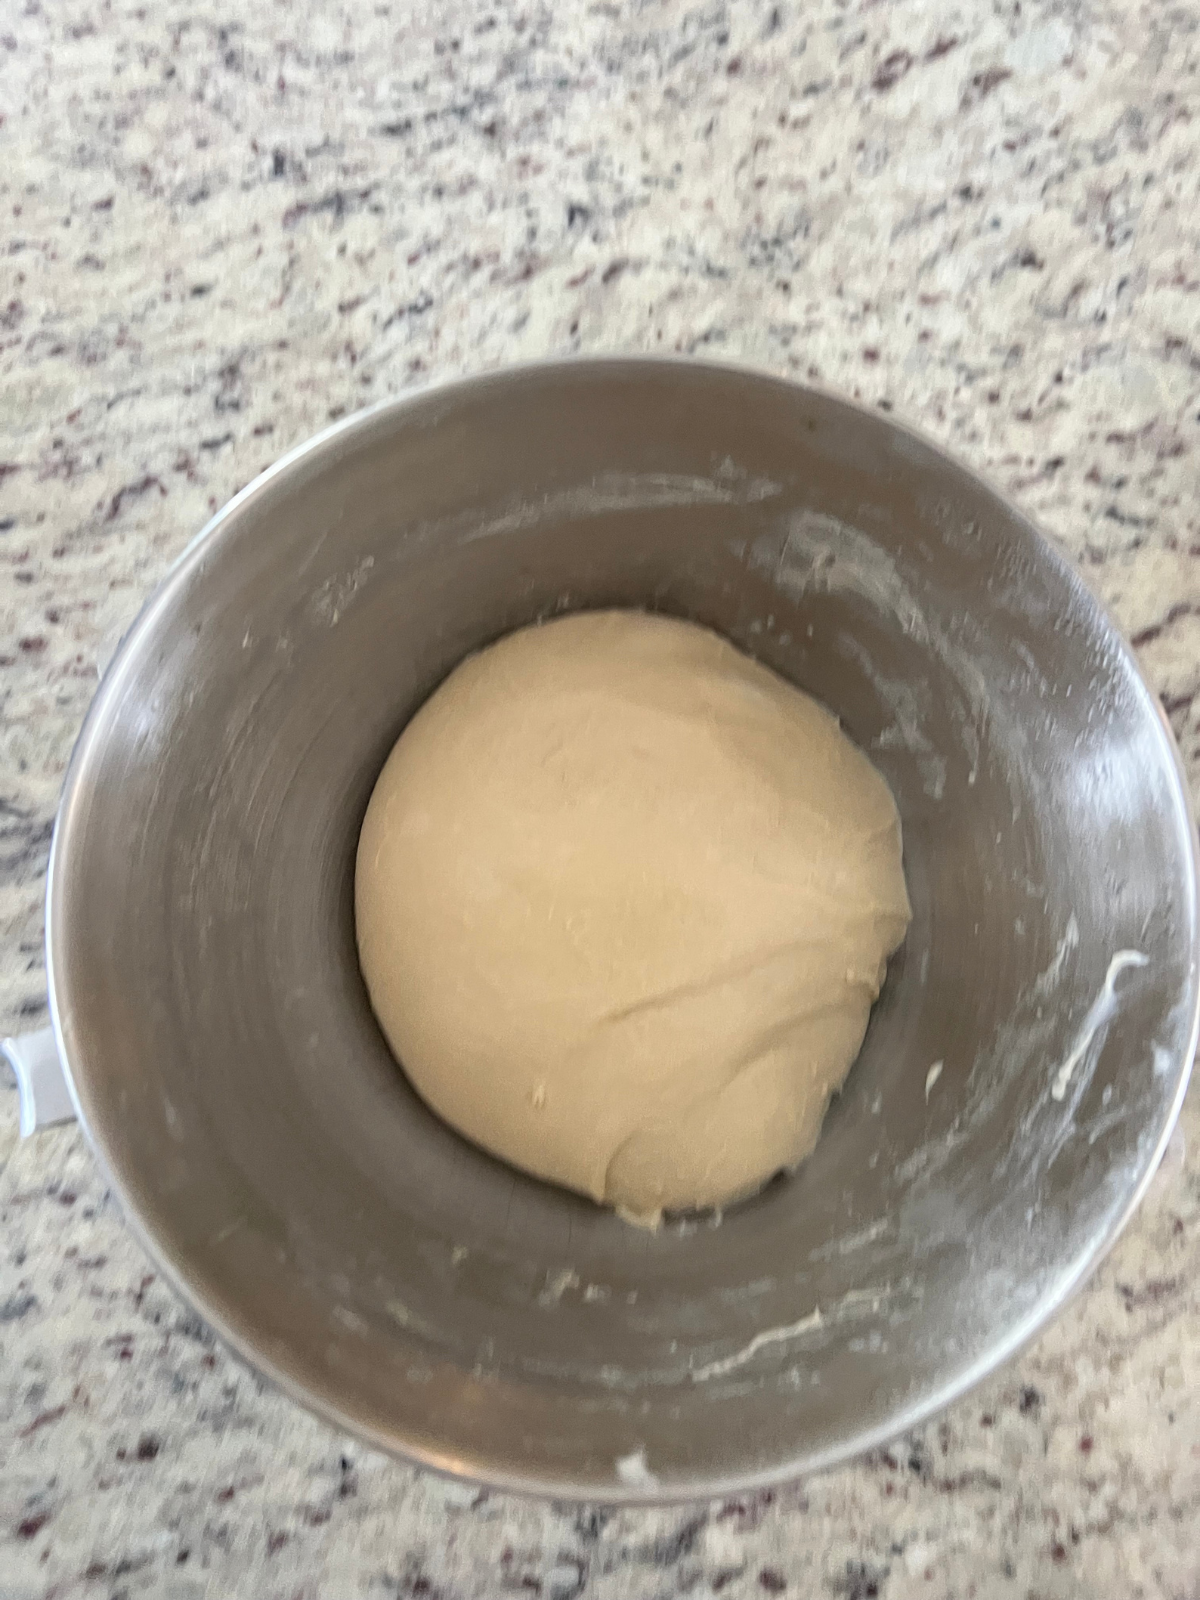
Connect the dough hook attachment to your stand mixer. Add sourdough starter, warm milk, flour, eggs, salt, and sugar to a stand mixer. Mix until a shaggy dough forms, scraping the bowl as needed.
With the mixer running, add softened butter one tablespoon at a time, allowing each piece to fully incorporate before adding more.
Increase speed to high and knead for 5–7 minutes, until the dough is smooth, elastic, and pulls away from the sides of the bowl.
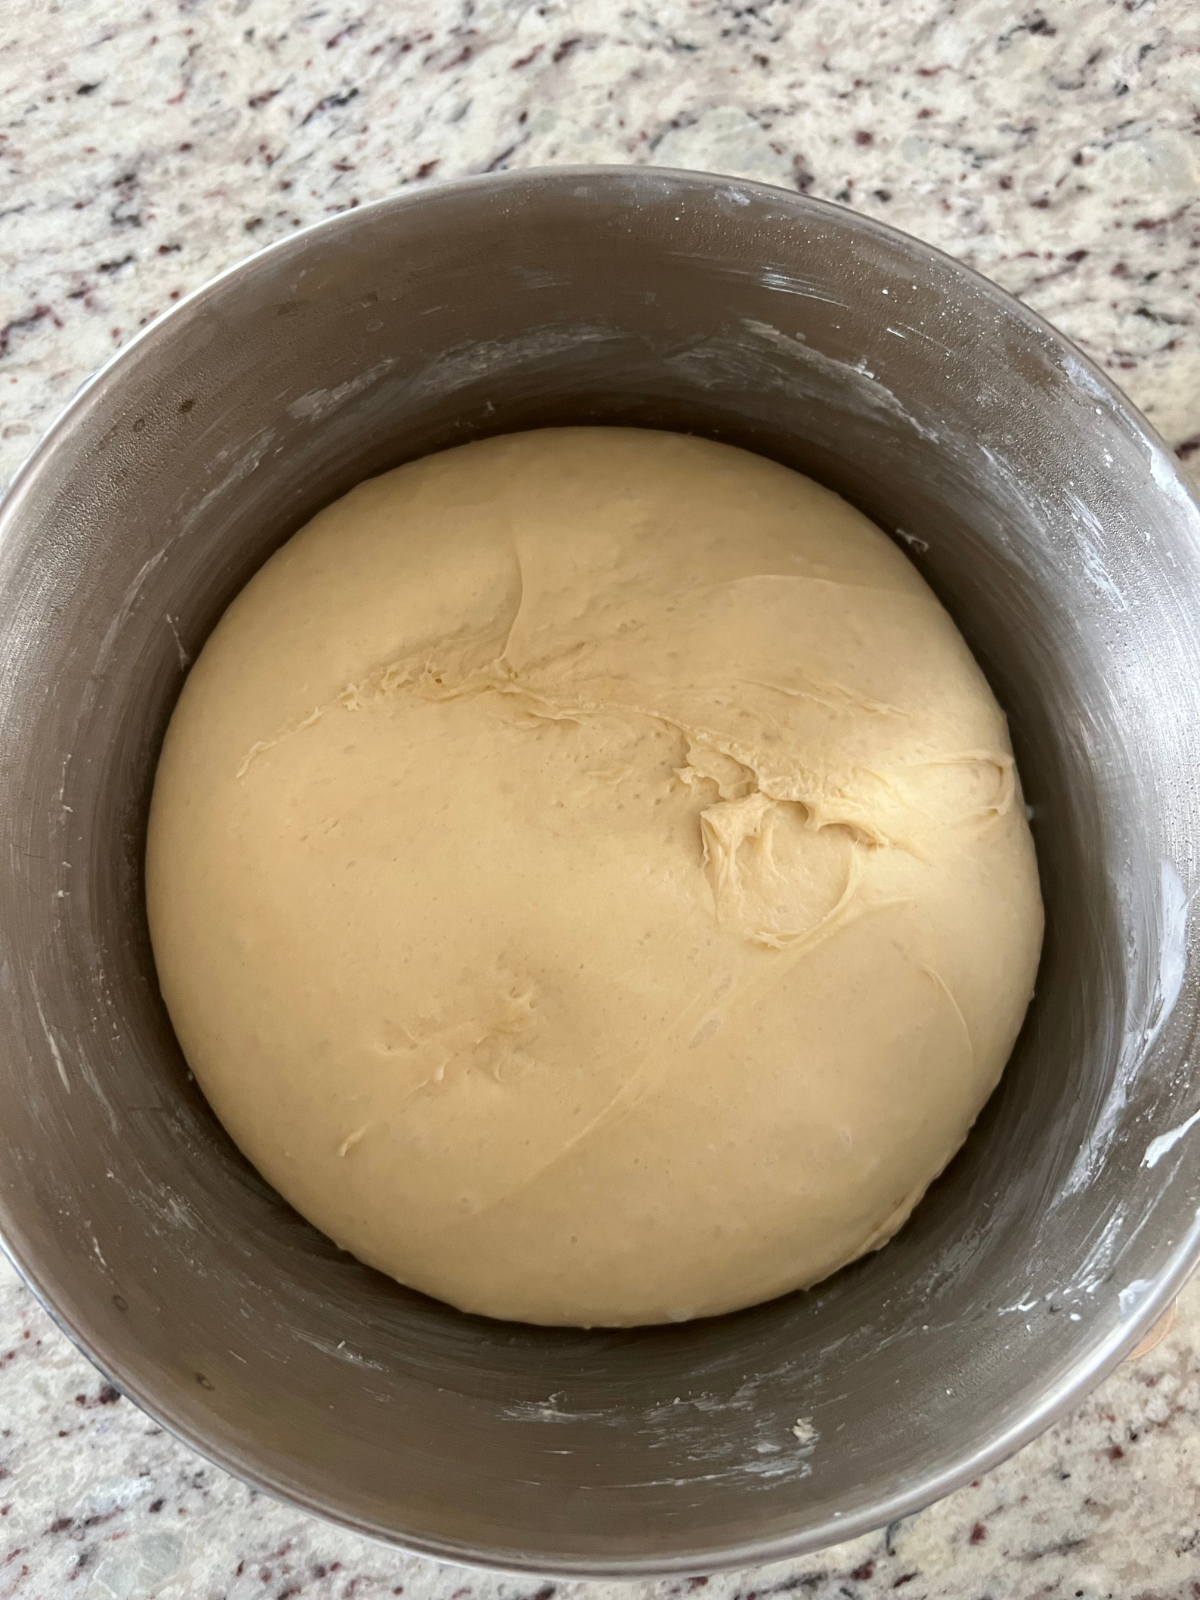
Let rise at room temperature for 4–6 hours until slightly puffy (about 50–70% increase).
Optional: Perform 1–2 stretch and folds during bulk fermentation to strengthen the dough.
Cover the dough tightly and refrigerate overnight for cold fermentation.
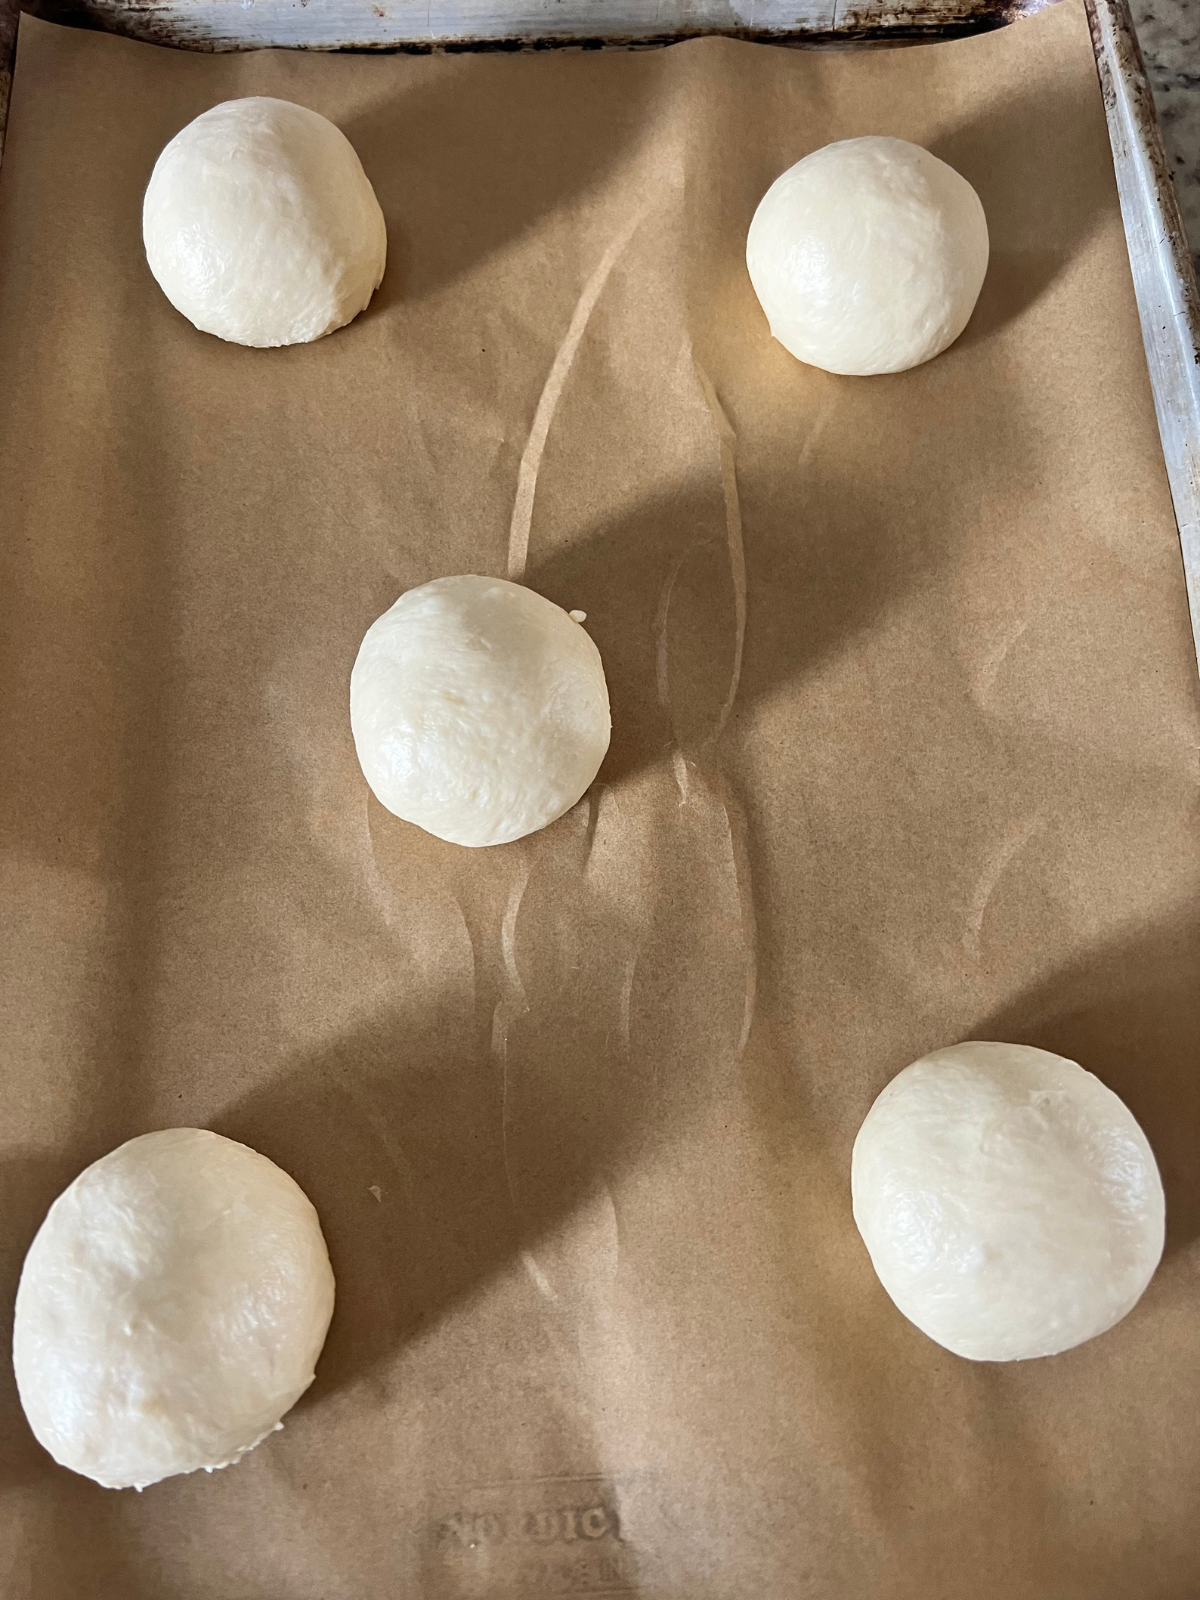
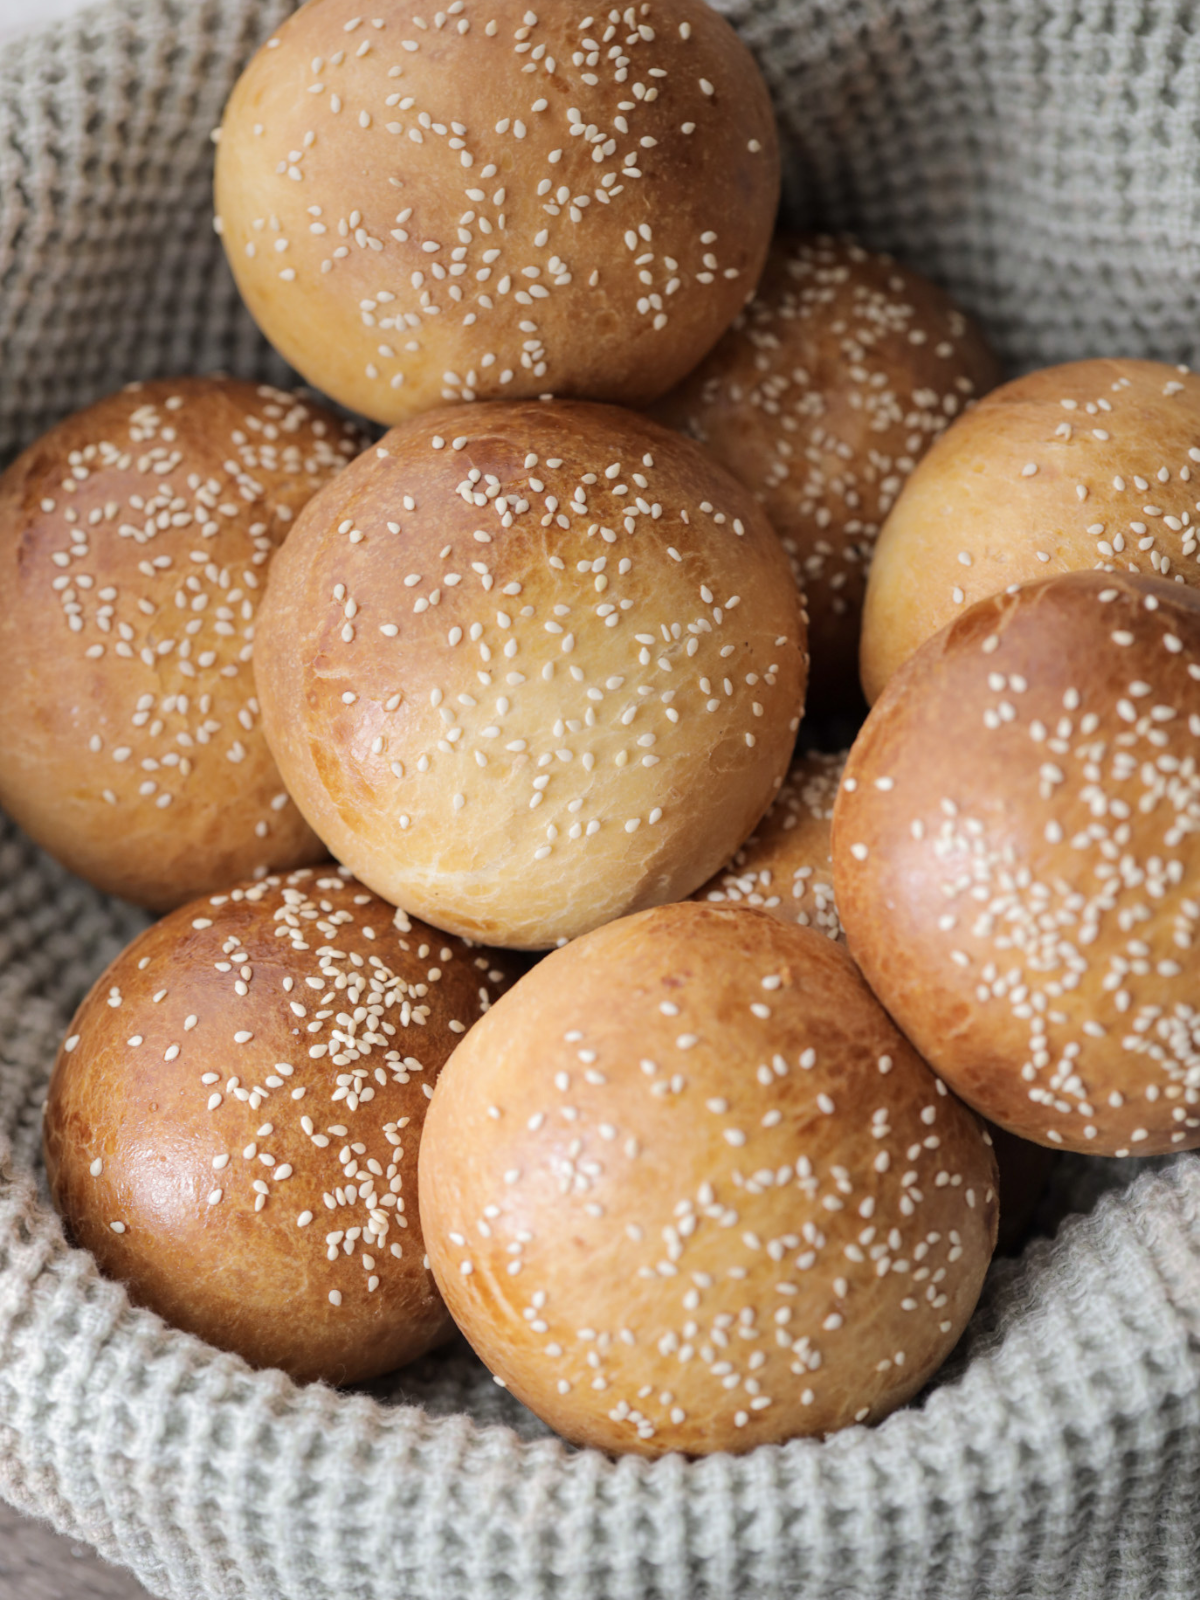
Turn the chilled dough onto a lightly floured surface and divide into 9 equal portions (about 100–105 g each).
Shape each piece into a tight ball by pinching the seams together, then rolling against the counter until smooth.
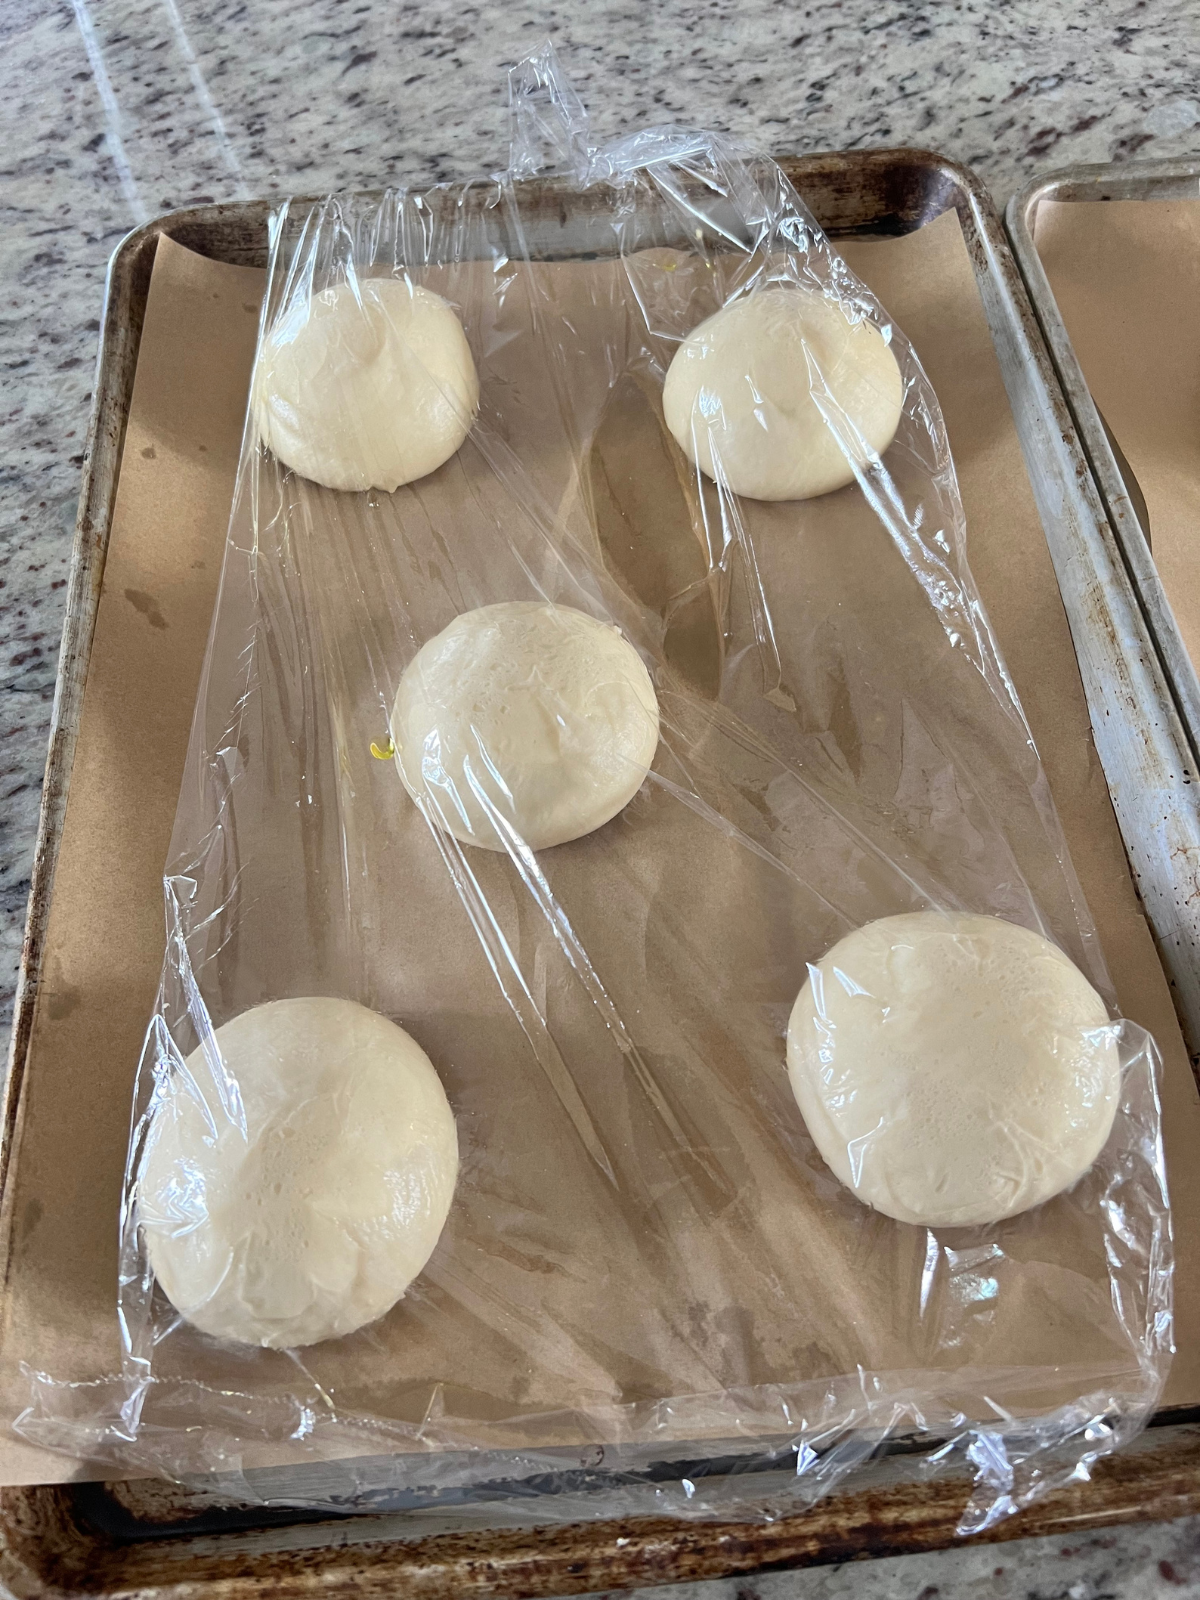
Place buns on parchment-lined baking sheets (5 on one sheet, 4 on another). Cover with greased plastic wrap.
Let rise for 1–4 hours, until visibly puffy but not fully doubled.
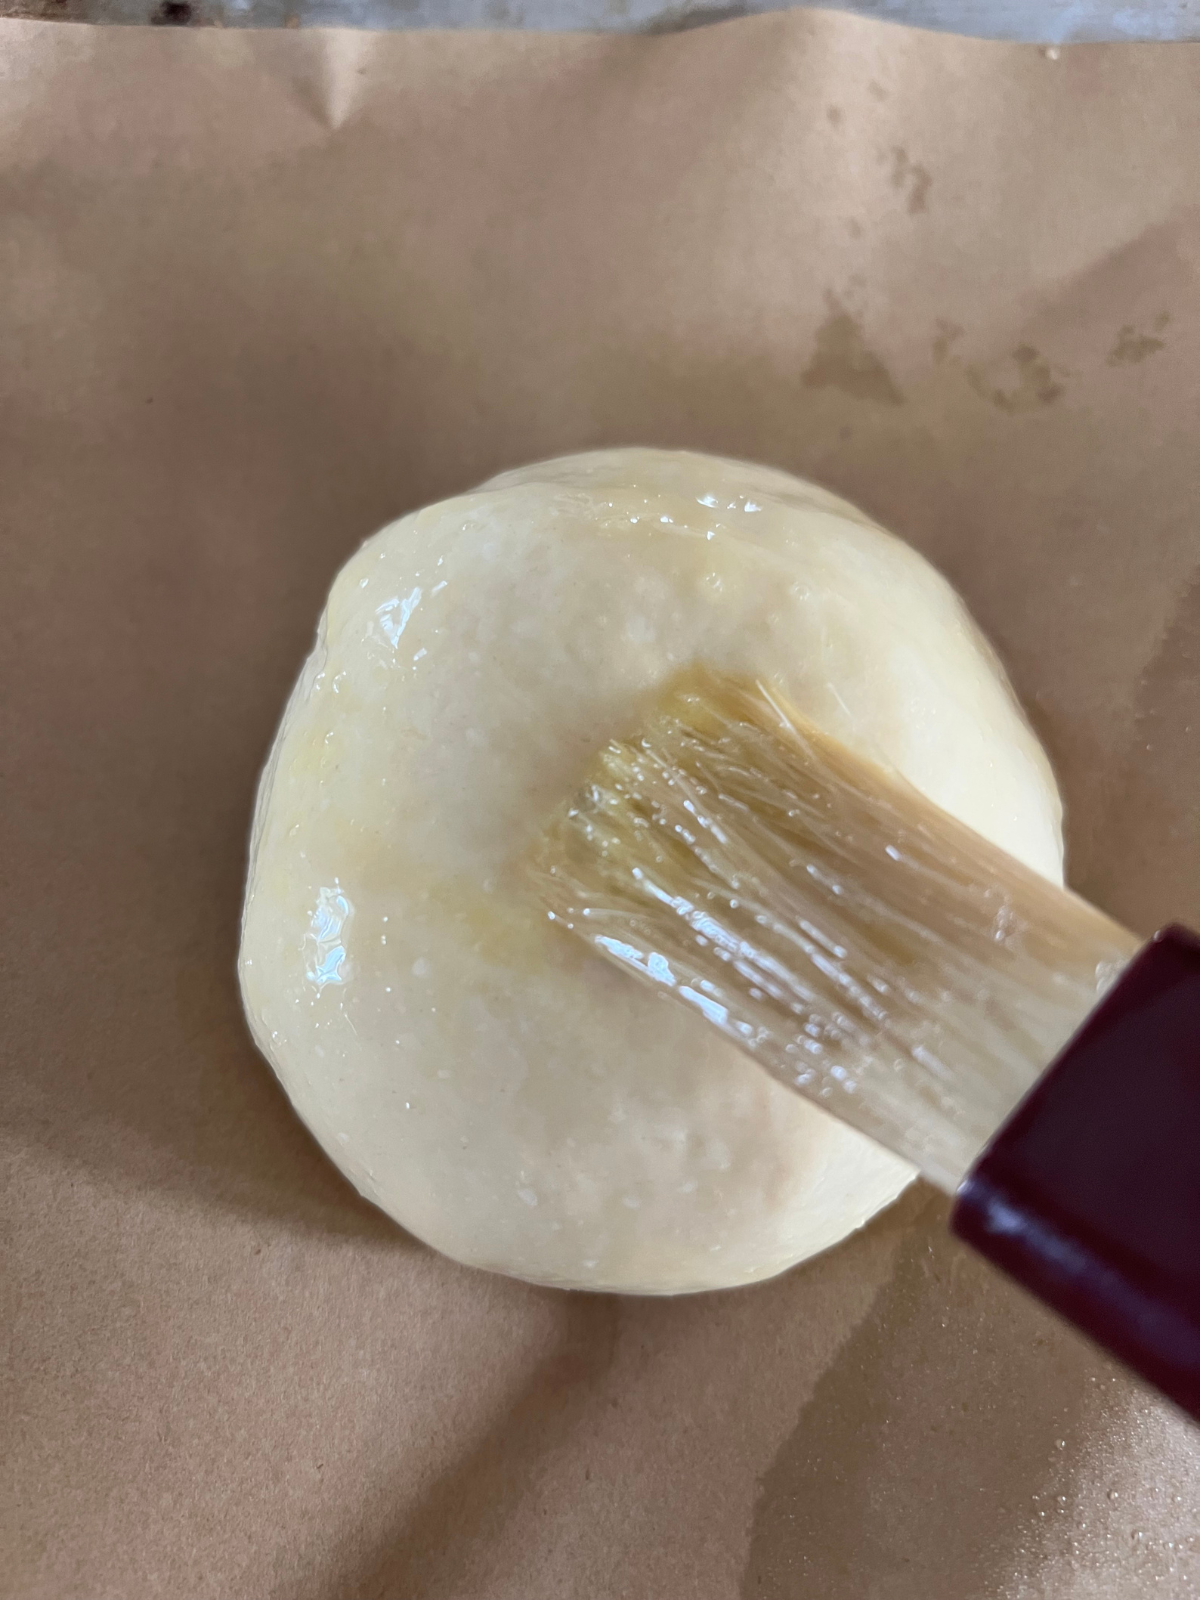
Preheat oven to 350°F (175°C). Beat one egg and brush over the tops, then sprinkle with sesame seeds if using.
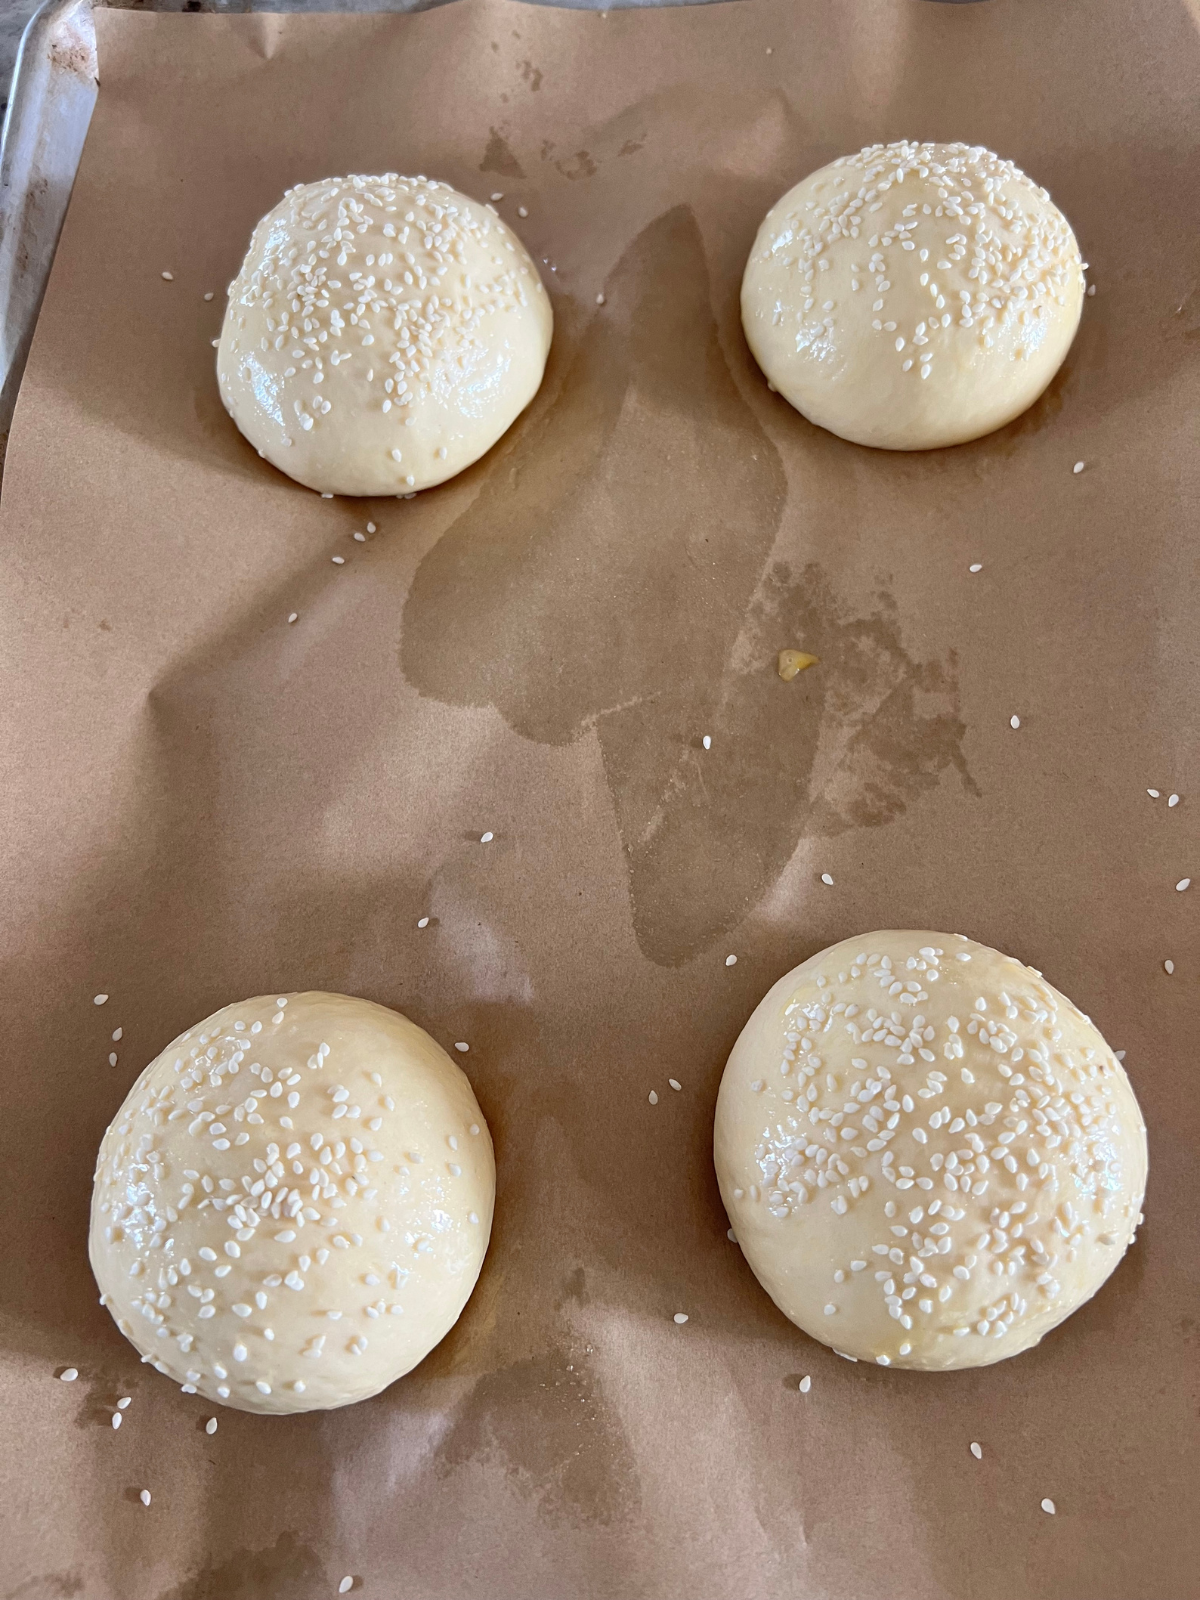
Bake on the second and fourth racks from the top for 22–25 minutes, switching pans halfway through, until deep golden and 200-205°F (96°C) internally.
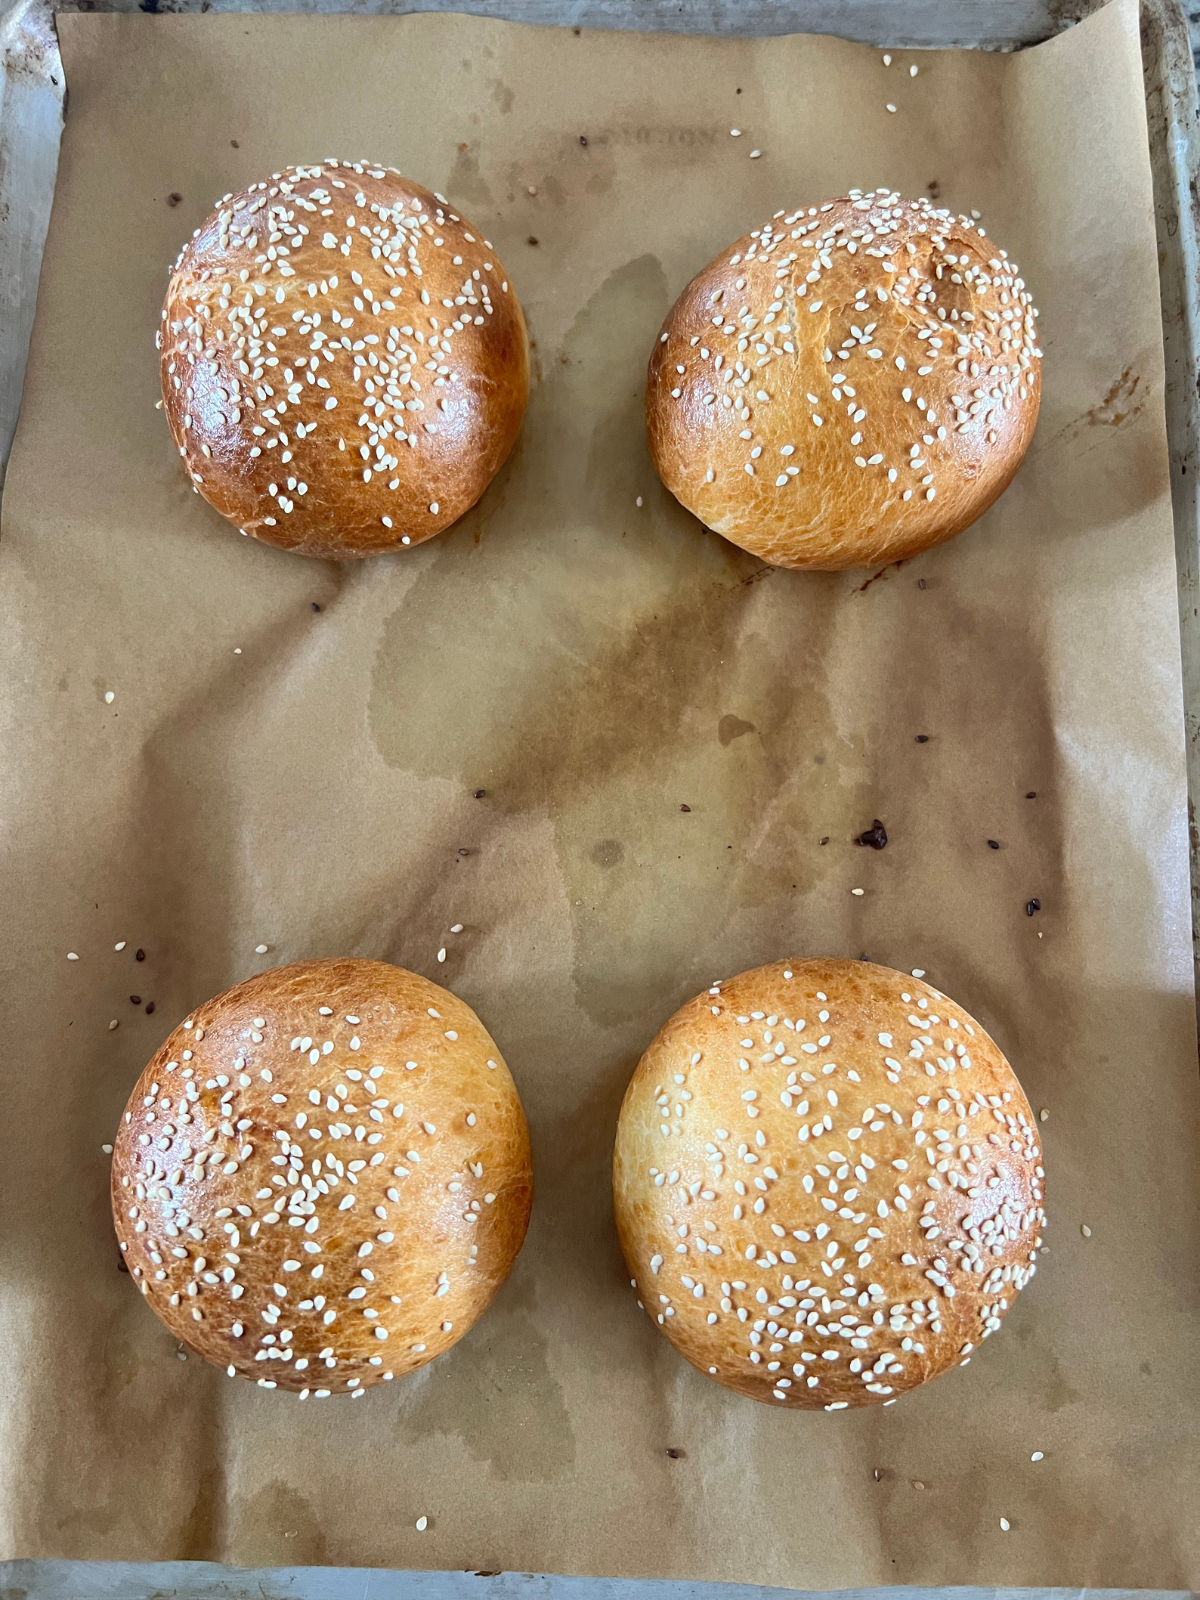
Transfer to a wire rack and cool completely before slicing.
Helpful Tips for Making the BEST Sourdough Burger Buns
Bake to temperature, not just color
A deep golden brown is a good indicator, but for best results, check that the internal temperature reaches 96°C (205°F) to ensure they’re fully baked without being dry.
Use an active, bubbly starter
Your starter should be at peak activity—doubled in size, airy, and slightly domed. This ensures a good rise and light texture in your buns.
Don’t rush the butter incorporation
Adding butter too quickly can cause the dough to break. Go slowly and allow each piece to fully absorb for a smooth, cohesive dough.
Watch the dough, not the clock
Rise times can vary based on your kitchen temperature. Look for visual cues like a 50–70% rise during bulk and puffy, airy dough during the final proof.
Shape tightly for better structure
Creating surface tension when shaping helps the buns rise upward instead of spreading, giving you taller, more uniform burger buns.
Equipment
- Instant-read thermometer (for checking doneness)
- Stand mixer with dough hook attachment
- Large mixing bowl
- Rubber spatula or dough scraper
- Kitchen scale (for accurate measuring and dividing)
- Measuring cups and spoons
- Plastic wrap (lightly greased) or reusable bowl cover
- Bench scraper or knife (for dividing dough)
- Baking sheets (2)
- Parchment paper
- Pastry brush (for egg wash)
- Small bowl (for egg wash)
- Wire cooling rack
Storage
- For a fresh-from-the-oven feel, lightly toast or warm before serving.
- Store completely cooled buns in an airtight container or sealed bag at room temperature for up to 3 days.
- For best texture, keep them in a cool, dry place and avoid refrigerating, as this can dry them out.
- To freeze, place buns in a freezer-safe bag or container and freeze for up to 2 months.
- Thaw at room temperature or gently warm in the oven at 150°C (300°F) until soft.
More Sourdough Sides
- sourdough fry bread
- sourdough pretzels
- sourdough garlic cheesy naan
- sourdough pickle focaccia
- sourdough soft tortillas
Sourdough Brioche Burger Buns
Ingredients
- 160 g active sourdough starter 2/3 cup
- 120 g warm milk 1/2 cup, temperature should be slightly warm to the touch, but not hot
- 390 g bread flour (recommended) or all-purpose flour 3 1/4 cups
- 2 large eggs room temperature
- 3 g salt 1/2 teaspoon
- 50 g granulated sugar 1/4 cup
- 113 g salted butter softened (8 tablespoons)
For the egg wash:
- 1 large egg whisked
- sesame seeds optional, to sprinkle over the top of buns before baking
Instructions
Mix the dough
- In the bowl of a stand mixer fitted with a dough hook, add the sourdough starter, warm milk, flour, eggs, salt, and sugar.
- Mix on low to medium speed until a shaggy dough forms.
- Stop the mixer as needed and use a rubber spatula to scrape down the sides and bottom of the bowl to ensure all ingredients are evenly incorporated.
- The dough will look rough and slightly sticky at this stage—this is normal.
Incorporate the butter
- With the mixer running on medium speed, add the softened butter one tablespoon at a time.
- Allow each piece of butter to fully incorporate into the dough before adding the next.
- This gradual addition is important to properly develop the dough and create a soft, enriched texture.
- The dough may look slightly greasy or separated during this step but will come back together as mixing continues.
Knead the dough
- Increase the mixer speed to medium-high (I tend to keep it high) and knead for about 5-7 minutes.
- The dough should become smooth, elastic, and slightly tacky but not overly sticky.
- It should begin to pull away from the sides of the bowl and pass a windowpane test (you can stretch a small piece thin enough to see light through without tearing).
Bulk fermentation
- Transfer the dough to a lightly greased bowl and cover with plastic wrap or a damp towel.
- Let the dough ferment at room temperature for 4–6 hours.
- During this time, the dough should rise by about 50–70%, not necessarily double.
- For added strength and improved structure, perform 1–2 sets of stretch and folds during fermentation:
- Gently pull one side of the dough up and fold it over itself.
- Rotate the bowl and repeat on all sides.
- Cover and continue fermenting.
Cold fermentation
- Once the dough has partially risen, cover it tightly and transfer to the refrigerator.
- Allow the dough to cold ferment overnight (8–16 hours).
- This step enhances the flavor and firms up the dough, making it much easier to shape the next day.
Divide and shape
- Remove the dough from the refrigerator and turn it out onto a lightly floured surface.
- Divide the dough evenly into 9 portions, approximately 100–105 g each.
- To shape:
- Take each piece of dough and gently flatten it slightly.
- Pinch the edges toward the center to create a seam.
- Flip the dough seam-side down.
- Cup your hand around the dough and roll it against the work surface to create a tight, smooth ball.
- Proper shaping is key to achieving tall, round buns with a soft, even crumb.
Second rise (proofing)
- Place the shaped dough balls onto two parchment-lined baking sheets, spacing them evenly apart.
- Arrange 5 buns on one sheet and 4 on another for proper airflow.
- Lightly grease a piece of plastic wrap and cover the buns loosely.
- Let them rise at room temperature for 1–4 hours.
- The buns should become visibly puffy and airy but do not need to fully double in size.
- When gently pressed, the dough should slowly spring back, leaving a slight indentation.
Preheat and prepare for baking
- Preheat your oven to 350°F (175°C).
- In a small bowl, whisk the egg to create the egg wash.
- Gently brush the tops of the buns with the egg wash, being careful not to deflate them.
- Sprinkle with sesame seeds if desired.
Bake
- Place one baking sheet on the second rack from the top and the other on the fourth rack.
- Bake for 22–25 minutes, or until the buns are deep golden brown.
- Halfway through baking, switch the positions of the pans to ensure even browning.
- The buns are done when they reach an internal temperature of 200-205°F (96°C).
Finish and cool
- Remove the buns from the oven.
- Transfer to a wire rack and allow them to cool completely before slicing.
Notes
Storage
- Store completely cooled buns in an airtight container or sealed bag at room temperature for up to 3 days.
- For best texture, keep them in a cool, dry place and avoid refrigerating, as this can dry them out.
- To freeze, place buns in a freezer-safe bag or container and freeze for up to 2 months.
- Thaw at room temperature or gently warm in the oven at 150°C (300°F) until soft.
- For a fresh-from-the-oven feel, lightly toast or warm before serving.


Soft, fluffy, 100% sourdough. We love these for grilling season! Let me know what you think if you make them!