How to Make Your Own Sourdough Starter From Scratch
As an Amazon Associate, I earn from qualifying purchases.
Making your own sourdough starter is one of the most rewarding parts of baking from scratch. It’s simple, but it does take patience. If you spend a few minutes a day for about 14 days, you will be rewarded with a beautiful, bubbly, and active sourdough starter ready to bake sourdough bread with!
Within about 14 days, you can turn basic pantry ingredients into a living, bubbling starter that will help you bake everything from artisan sourdough bread to pancakes, cookies, cakes, and more.
Below are all the steps (including day-by-day videos that walk you through the process). You’re essentially cultivating wild yeast and beneficial bacteria using just flour, water, time, and consistency.
Here’s a complete beginner-friendly guide to creating your own sourdough starter from scratch. When you’ve got your active sourdough starter, I recommend baking this beginner-friendly sourdough loaf for your first bake!
Want a printable version of these instructions? Sign up for my email to receive this free printable! How to Make a Sourdough Starter From Scratch
Equipment Needed
- Clear glass container–I love these Weck jars, but a mason jar or even an old pasta jar works lovely!
- Digital kitchen scale
- Spoon, spatula, or spurtle (these are my favorite, because they are flat and easy to wash!)
- Rubber band or dry-erase marker (to track rise)
- Unbleached all-purpose flour (I love Farmer Direct flour, but any will do)
- Rye flour (optional, but highly recommended for stronger fermentation) I love this organic rye flour! You can also use whole wheat flour. This will be used around days 3 or 4.
- Room temperature water (non-chlorinated if possible)
- Something to cover the jar with. Paper towel with a rubber band, plastic wrap, a kitchen towel, a lid that isn’t completely enclosing the jar. Something that will cover the jar but also keep out any fruit flies, etc.
Starter Basics (Before You Begin)
Before diving into the process, here are a few important rules that will guide your starter from day one:
- Feed regularly
- Discard half before each feeding
- Mix thoroughly every time
- Scrape the sides and bottom of the container
- Keep the container loosely covered
- The first few days, you will discard half and feed once every 24 hours; after that, you will discard and feed twice a day (about every 12 hours).
Important note:
In the first few days, your starter may smell unpleasant. This is completely normal. As it matures, the smell should become mildly tangy, slightly sweet, and pleasantly yeasty—not harsh or rotten.
Day-by-Day Instructions
Day 1
- Place the empty jar on top of the kitchen scale.
- Add 60 g water + 60 g unbleached flour to your container
- Mix until completely smooth
- Scrape the sides and bottom thoroughly
- Loosely cover the container
- Mark the starting level with a rubber band or marker
- Let rest at room temperature

Temperature tip:
If your kitchen is cool, place the container in a slightly warmer spot like:
- Inside the microwave (turned off)
- On top of the fridge
- Near a warm appliance
Do not expect any visible rise yet—this is normal. Check out the video below to see how I make this sourdough starter!
Day 2
- Discard half of the starter
- Feed 60 g water + 60 g unbleached flour
- Mix thoroughly
- Scrape sides clean
- Feed once during the day
You may begin to notice a few bubbles, but activity is still developing.

Day 3
- Discard half
- Feed 60 g water + 60 g flour
- Mix well and scrape sides
What you may see:
A sudden burst of activity—bubbles and rising.
This is called a false rise. It happens due to early bacteria, not stable yeast, and it will usually slow down again afterward. This is completely normal.
Continue feeding once daily.

Day 4 — Begin Twice Daily Feedings
- Discard half before each feeding
- Start feeding every 12 hours
- Feed: 60 g water + 60 g flour
- Optional: replace 10–30 g of flour with rye flour for extra fermentation and activity.
Rye flour helps boost fermentation and strengthen your starter more quickly. You can also use whole wheat flour instead of Rye flour.

Days 5–14 (along with videos for each day!)
- Continue discarding half every 12 hours
- Feed 60 g water + 60 g flour each time (feel free to use half rye (30g) and half regular flour (30g) during these feeds)
- Include a small portion of rye flour if desired
- Mix thoroughly every feeding
- Scrape sides and bottom clean every time
Consistency is key during this stage. You may look at your starter on day 7, 8, or 9 and say, “Hey! This is looking great, I can bake with it!” I highly recommend holding strong and getting through 14 days of regular discards and feeds before you attempt to bake with it.
The sourdough bread you make with a starter that is only 7 days old is going to be flat and probably disappointing. You have a much better chance and a nice, fluffy loaf of artisan sourdough bread once your starter is 14 days old.


What to Expect During the Process
As your starter develops, you’ll notice:
- Bubbles forming throughout the mixture
- Rising after feedings
- A tangy, yogurt-like smell
- Periods of strong activity followed by slower days
Important:
It’s very normal for your starter to slow down after the false rise. Keep feeding consistently—it will come back stronger.
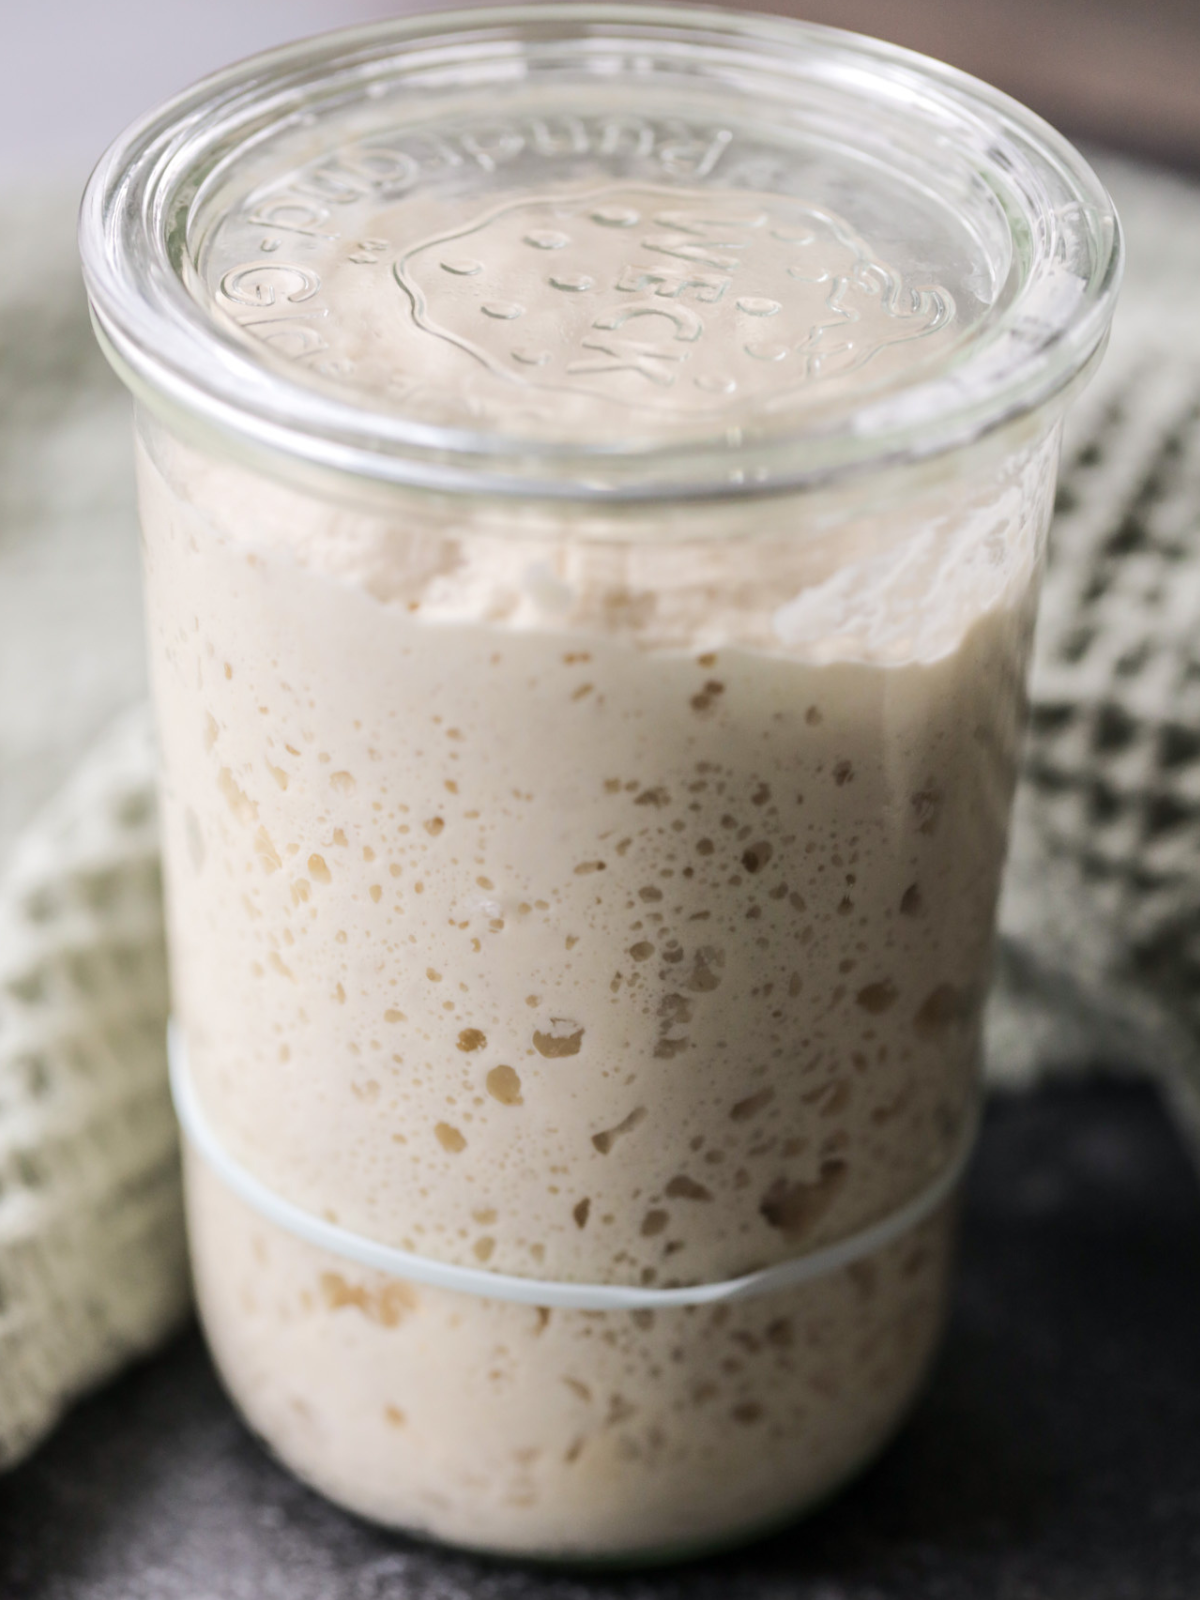
When Is Your Sourdough Starter Ready?
Your starter is ready to bake with when it:
- Doubles in size within 4–6 hours after feeding
- Looks airy, bubbly, and active
- Smells pleasantly tangy, actually quite sweet! (not harsh or unpleasant)
- Passes the “float test” (optional): a spoonful floats in water
Once it consistently shows this behavior, it’s strong enough to bake sourdough bread. I highly recommend discarding and feeding (and not baking with the starter) until Day 14.
By Day 14, your sourdough starter is still a baby–it will continue to get stronger as the days, weeks, and months go on– but it will be fermented enough to produce a lovely loaf of bread!
Helpful Tips for the Best Sourdough Starter
Use warm, not hot water
Aim for 70–75°F (21–24°C). Warm water encourages fermentation, while hot water can kill beneficial microbes.
Stay consistent with feedings
Timing matters more than perfection. Try to feed every 12 hours once you reach that stage.
Mix thoroughly every time
No dry flour should remain. Scrape the sides and bottom to keep everything evenly hydrated.
Use a clear container
This makes it easy to see bubbles, rise, and overall activity.
Mark your starter level
Use a rubber band or marker to track growth after feedings.
Choose the right flour
Unbleached all-purpose flour works well, but adding whole wheat or rye boosts activity significantly.
Keep it in a stable environment
Avoid cold drafts and direct sunlight. A warm kitchen counter works well.
Be patient with the false rise
Around day 3, you’ll likely see a big rise that drops quickly. This is normal and not the final stage.
Let smell guide you
- Good: tangy, yogurt-like, slightly sweet
- Bad: rotten, moldy, or unpleasantly sharp
Avoid metal containers or utensils (long-term contact)
Glass, ceramic, or food-safe plastic is best for ongoing storage.
Adjust hydration if needed
- Too thick → add a little more water
- Too runny → add a little more flour
Keep it clean—but not sterile
Clean containers help prevent mold, but wild yeast needs a natural environment to develop.
Final Thoughts
Creating a sourdough starter from scratch is a slow but incredibly rewarding process. You’re literally cultivating a living culture that will bake bread for years to come.
The key ingredients aren’t just flour and water—they’re patience, consistency, and time.
Stick with it through the false rise and slow days, and soon you’ll have a strong, active starter ready to bake beautiful sourdough bread and so much more. You’re going to be so very proud of yourself once you’ve baked your first loaf of bread!!
Want all of this information in a simple printable? Find it here: Sourdough Starter From Scratch Printable
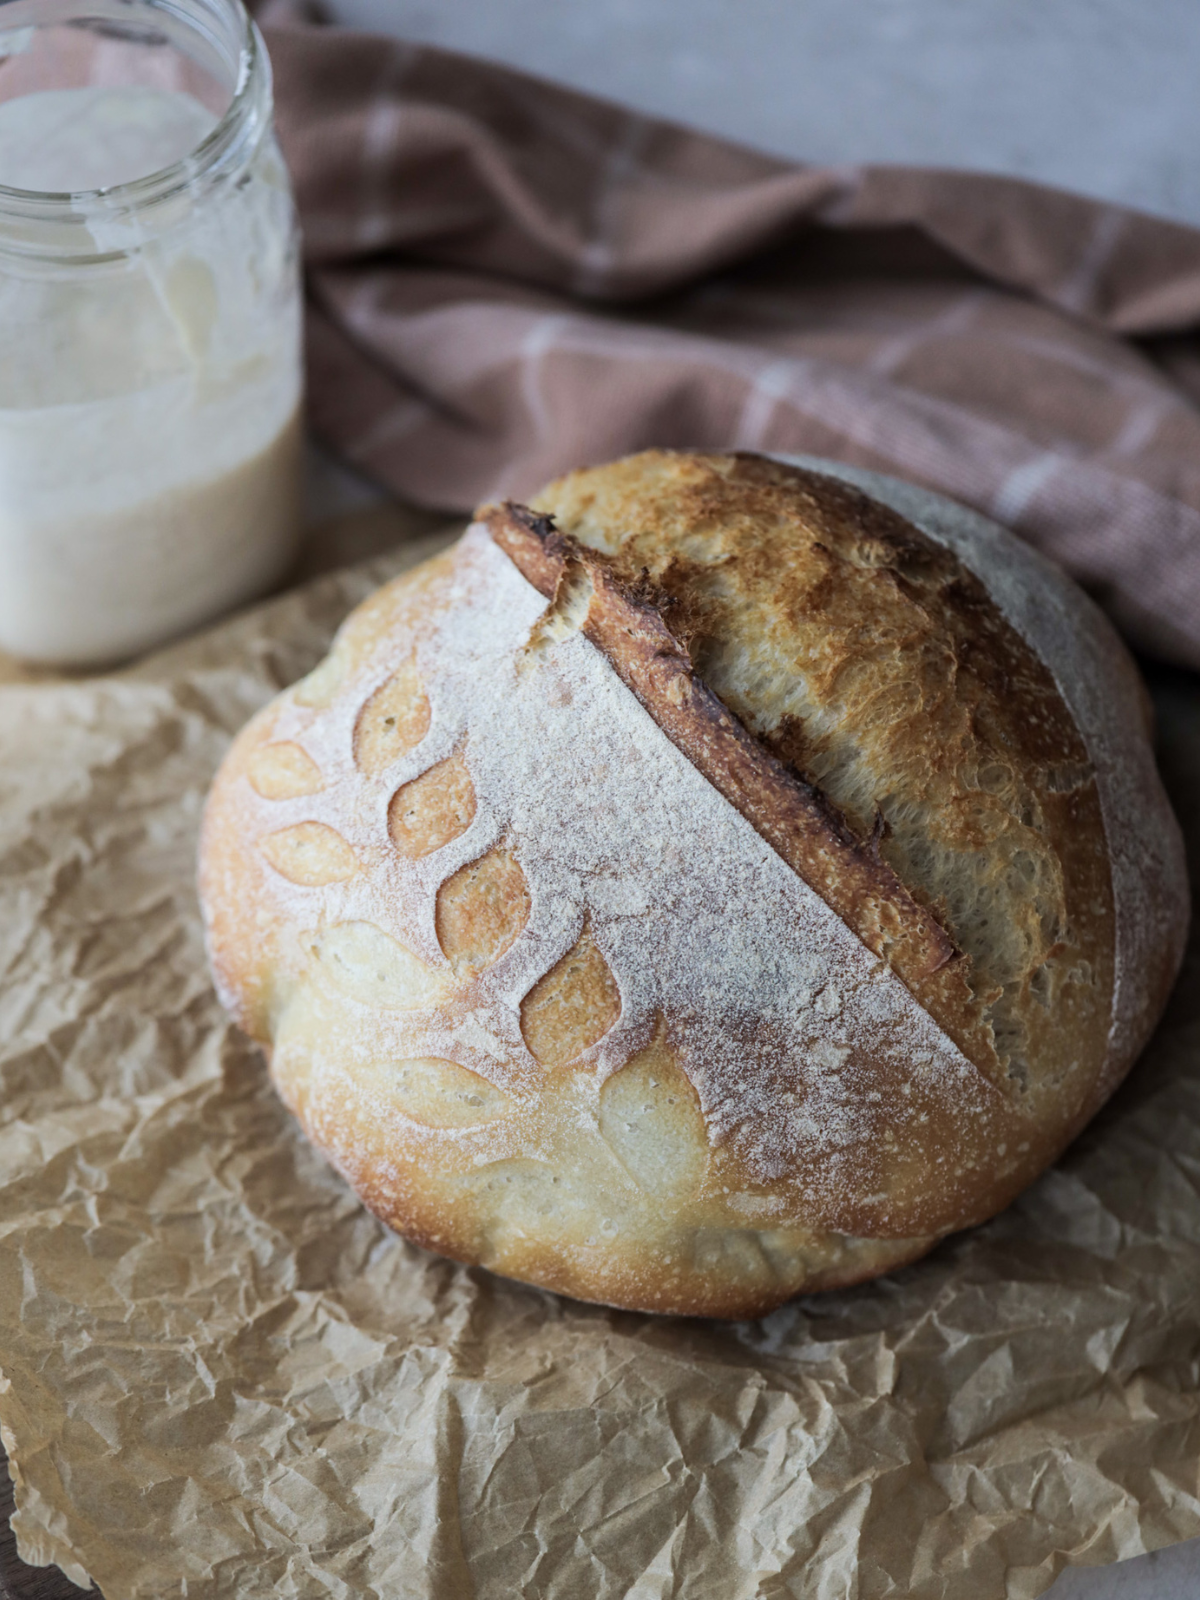
Here’s an easy sourdough bread recipe to make your first loaf now that you have an active starter:
Beginner-Friendly Sourdough Bread Recipe
What to Do After Making Your Sourdough Starter
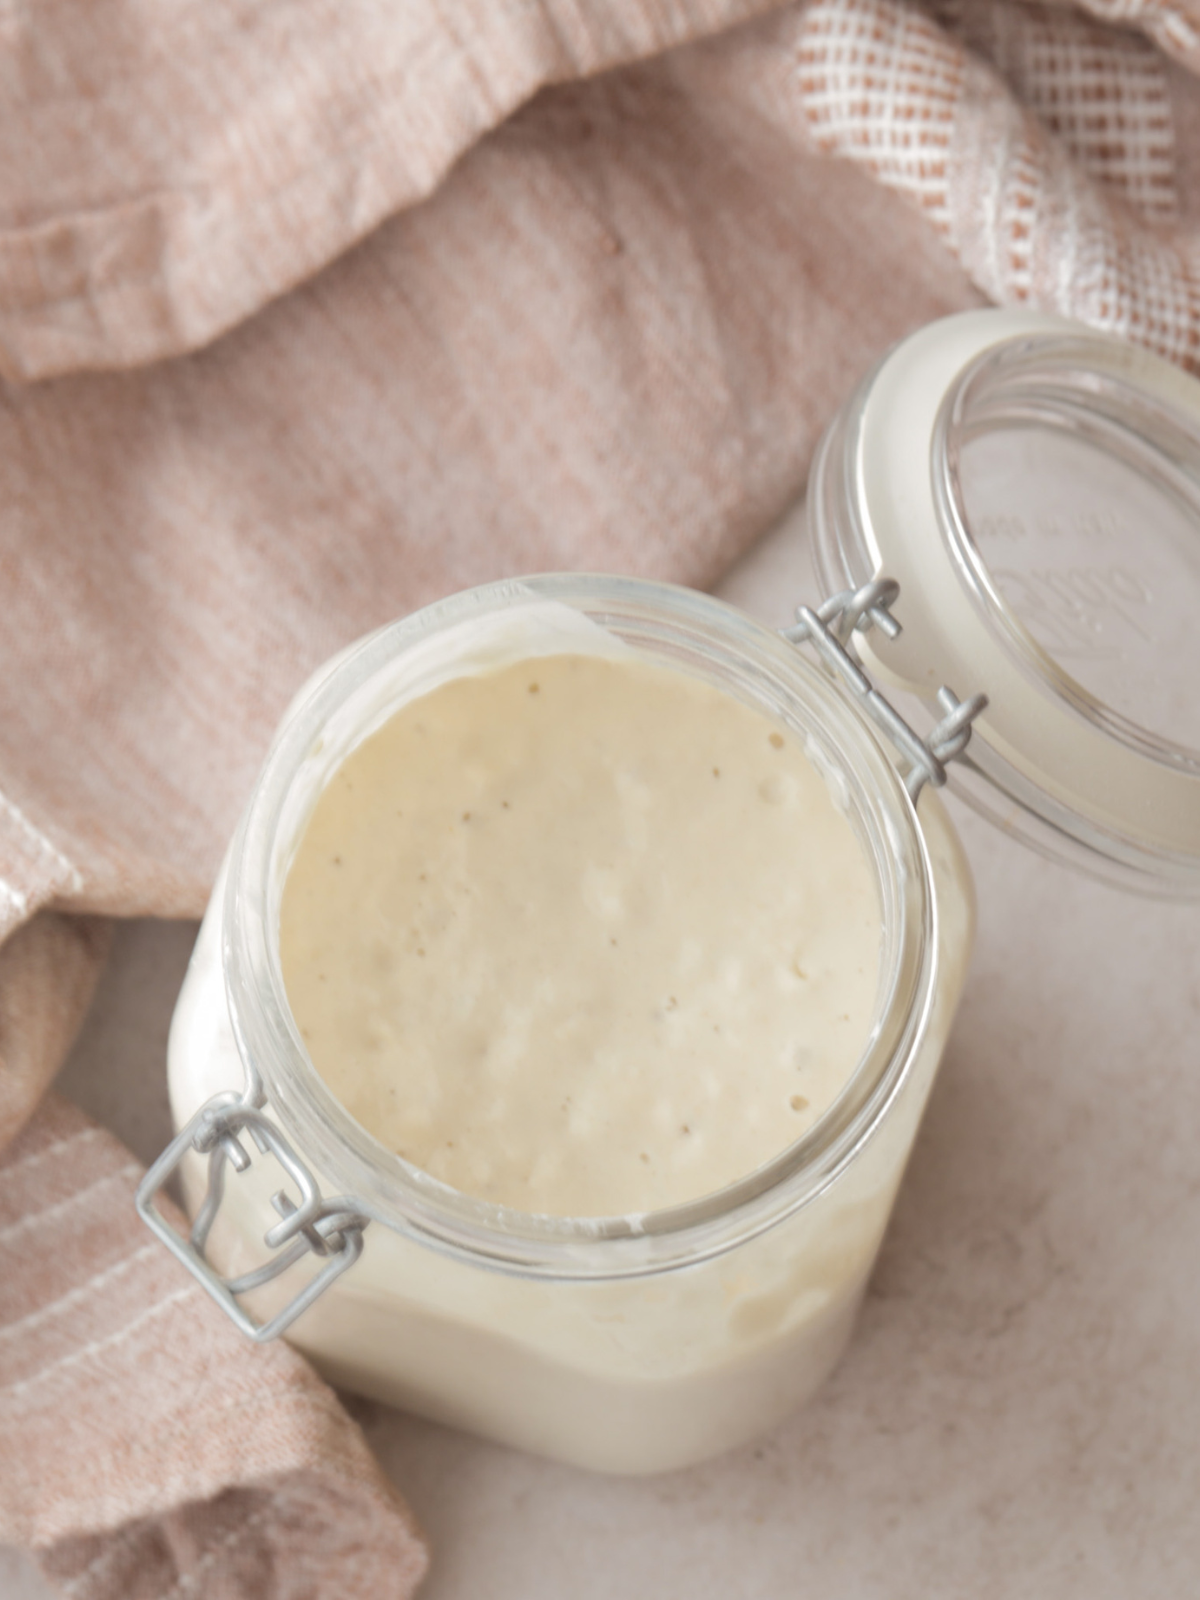
Once your sourdough starter is active, bubbly, and consistently rising after feedings, you can begin using it to bake bread and other sourdough recipes. At this point, you will also need to decide how you want to store and maintain it.
How to Store Your Sourdough Starter
If you bake frequently, you can keep your sourdough starter at room temperature. Store it in a clean jar with the lid loosely covered, and feed it regularly—typically once every 12–24 hours, depending on how warm your kitchen is and how often you use it.
If you only bake occasionally, storing your starter in the refrigerator is usually the easiest option. Feed your starter, allow it to sit at room temperature for a few hours, and then place it in the refrigerator with the lid securely covered. A refrigerated starter generally only needs to be fed about once a week.
How to Use a Starter Stored in the Refrigerator
When you are ready to bake, remove your starter from the refrigerator and let it come to room temperature. Feed it and allow it to become active and bubbly before using it in a recipe. Depending on how long it has been since its last feeding, your starter may need one or more feedings to become strong and active again.
A healthy, active starter should show plenty of bubbles and should rise noticeably after feeding. Many bakers use their starter when it is at or near its peak—when it has doubled in size and is full of bubbles.
What to Do With Your Starter Between Bakes
You do not need to keep a large amount of sourdough starter on hand. Before feeding, discard a portion of the starter and then feed the remaining starter with fresh flour and water. This helps keep the amount of starter manageable and prevents you from using excessive amounts of flour.
The discarded portion, often called sourdough discard, can be used in recipes such as pancakes, waffles, crackers, muffins, cookies, and other baked goods.
How to Know if Your Starter Is Healthy
A healthy sourdough starter should smell pleasantly tangy, yeasty, or slightly sour. It should become bubbly and rise after feeding.
A thin layer of liquid, called hooch, may occasionally form on top of the starter. This usually means the starter is hungry and needs to be fed. You can either stir the hooch back in or pour it off before feeding.
If you see mold or unusual colors such as pink, orange, or red, it is safest to discard the starter and begin again.
Once your sourdough starter is active and established, maintaining it is relatively simple. With regular feedings and proper storage, your starter can continue living and baking with you for years.
Let me know if you have any questions! Happy to help answer them as you make your own sourdough starter from scratch and your first loaf of sourdough bread!
How to Make Sourdough Starter From Scratch
Materials
- Clear glass container–I love these Weck jars but a mason jar or even an old pasta jar works lovely!
- Digital kitchen scale
- Spoon spatula, or spurtle (these are my favorite, because they are flat and easy to wash!)
- Rubber band or dry-erase marker to track rise
- Unbleached all-purpose flour I love Farmer Direct flour, but any will do
- Rye flour optional, but highly recommended for stronger fermentation I love this organic rye flour! You can also use whole wheat flour. This will be used around days 3 or 4.
- Room temperature water non-chlorinated if possible
- Something to cover the jar with. Paper towel with a rubber band plastic wrap, a kitchen towel, a lid that isn’t completely enclosing the jar. Something that will cover the jar but also keep out any fruit flies, etc.
Instructions
Sourdough Starter Basics
- Before getting started, there are a few important things to know:
- Feed your starter on a regular schedule.
- Discard half of the starter before every feeding to prevent it from becoming too large and to keep the yeast properly fed.
- Mix thoroughly after every feeding so all of the flour is hydrated and evenly incorporated.
- Scrape down the sides and bottom of the jar after stirring to prevent dry pockets of flour from developing.
- During the first few days, your starter will likely have an unpleasant smell. This is completely normal and part of the natural fermentation process.
- Once mature and ready to bake with, your starter should smell mildly sweet, slightly yeasty, and pleasantly tangy rather than sharply acidic.
Day 1: Create Your Starter
- In a clean glass jar, combine:
- 60 grams water
- 60 grams unbleached all-purpose flour
- Stir thoroughly until no dry flour remains and the mixture is smooth and thick, similar to pancake batter.
- Use a spatula to scrape down the sides and bottom of the jar so there are no dry spots hiding underneath the mixture.
- Loosely cover the jar with a lid, cloth, or coffee filter secured with a rubber band. The starter needs airflow while still being protected from drying out.
- Use a rubber band or dry-erase marker to mark the level of the starter in the jar. This makes it easy to track future growth.
- Do not expect any significant activity today or even tomorrow. Most starters do not begin rising until at least day three.
- Place the jar somewhere warm to rest at room temperature for 24 hours. If your kitchen is cool, cover the jar with a kitchen towel and place it inside an unheated microwave, turned-off oven with the light on, or another warm location.
Day 2: First Feeding
- After 24 hours, discard approximately half of the starter.
- To the remaining starter, add:
- 60 grams water
- 60 grams unbleached flour
- Mix thoroughly until smooth and scrape the sides of the jar clean.
- Today’s feeding schedule is simple: feed your starter once and then allow it to rest for another 24 hours.
- You may see a few bubbles, but many starters show very little activity on day two.
Day 3: The False Rise
- Discard half of the starter once again.
- Feed with:
- 60 grams water
- 60 grams unbleached flour
- Many new sourdough bakers notice a dramatic rise in activity around day three. Your starter may suddenly double or even triple in size and become filled with bubbles.
- This stage is often referred to as the “false rise.”
- The activity is caused by early bacteria that thrive during the beginning stages of fermentation rather than the stable wild yeast colony you’re trying to cultivate. While it can be exciting to see so much growth, your starter is not yet ready for baking.
- Continue feeding once per day and trust the process.
Day 4: Switch to Twice Daily Feedings
- Starting on day four, begin feeding your starter every 12 hours instead of every 24 hours.
- Before each feeding:
- Discard half of the starter.
- Add 60 grams water.
- Add 60 grams flour.
- Stir thoroughly and scrape the jar clean.
- To help strengthen your starter and encourage microbial activity, you can replace 10 to 30 grams of the flour with whole rye flour during each feeding.
- Many bakers find that rye flour helps establish a stronger and more active starter more quickly, especially in cooler environments.
Days 5 Through 14: Stay Consistent
- For the next week or two, continue following the same routine every 12 hours:
- Discard half of the starter.
- Feed with 60 grams water and 60 grams flour.
- Optionally include 10 to 30 grams of rye flour to boost activity.
- Stir thoroughly after every feeding.
- Scrape down the sides and bottom of the jar each time.
- Consistency is the key to success during this stage.
- It is very common for starters to become less active after the excitement of the false rise. Many people mistakenly believe their starter has died and give up too early.
- Keep feeding it.
- Even if your starter appears quiet for several days, important microbial changes are taking place beneath the surface as the wild yeast colony develops and stabilizes.
What to Expect During the Process
- Every starter develops at its own pace, but these are some common signs of progress:
- Small bubbles appearing throughout the mixture
- Increasing amounts of rise after feedings
- A pleasant tangy aroma similar to yogurt or buttermilk
- A light and airy texture developing over time
- Remember that periods of slower activity are completely normal, especially after the false rise.
- Continue feeding consistently and avoid changing your schedule too often.
When Is Your Sourdough Starter Ready to Bake With?
- A mature starter will show several signs that it is strong enough for baking:
- It consistently doubles in size within 4 to 6 hours after feeding.
- It has an airy texture filled with bubbles throughout the jar.
- It smells pleasantly tangy and yeasty rather than sharply acidic or unpleasant.
- It rises and falls predictably after each feeding cycle.
- For most kitchens, this process takes around 14 days, although cooler temperatures can extend the timeline slightly.
- Once your starter reaches this stage, you’re ready to bake your first loaf of homemade sourdough bread.


Thousands of people have followed along and created their own sourdough starter and a beautiful loaf of sourdough bread! I hope you find these instructions informative!
What happened after day 14?. Do i need to keep feeding the starter twice a day? . As ling as I have the starter?
I’ve just added this part to the end of my blog post to help you navigate what to do now! What to Do After Making Your Sourdough Starter
Once your sourdough starter is active, bubbly, and consistently rising after feedings, you can begin using it to bake bread and other sourdough recipes. At this point, you will also need to decide how you want to store and maintain it.
How to Store Your Sourdough Starter
If you bake frequently, you can keep your sourdough starter at room temperature. Store it in a clean jar with the lid loosely covered, and feed it regularly—typically once every 12–24 hours, depending on how warm your kitchen is and how often you use it.
If you only bake occasionally, storing your starter in the refrigerator is usually the easiest option. Feed your starter, allow it to sit at room temperature for a few hours, and then place it in the refrigerator with the lid securely covered. A refrigerated starter generally only needs to be fed about once a week.
How to Use a Starter Stored in the Refrigerator
When you are ready to bake, remove your starter from the refrigerator and let it come to room temperature. Feed it and allow it to become active and bubbly before using it in a recipe. Depending on how long it has been since its last feeding, your starter may need one or more feedings to become strong and active again.
A healthy, active starter should show plenty of bubbles and should rise noticeably after feeding. Many bakers use their starter when it is at or near its peak—when it has doubled in size and is full of bubbles.
What to Do With Your Starter Between Bakes
You do not need to keep a large amount of sourdough starter on hand. Before feeding, discard a portion of the starter and then feed the remaining starter with fresh flour and water. This helps keep the amount of starter manageable and prevents you from using excessive amounts of flour.
The discarded portion, often called sourdough discard, can be used in recipes such as pancakes, waffles, crackers, muffins, cookies, and other baked goods.
How to Know if Your Starter Is Healthy
A healthy sourdough starter should smell pleasantly tangy, yeasty, or slightly sour. It should become bubbly and rise after feeding.
A thin layer of liquid, called hooch, may occasionally form on top of the starter. This usually means the starter is hungry and needs to be fed. You can either stir the hooch back in or pour it off before feeding.
If you see mold or unusual colors such as pink, orange, or red, it is safest to discard the starter and begin again.
Once your sourdough starter is active and established, maintaining it is relatively simple. With regular feedings and proper storage, your starter can continue living and baking with you for years.
Following these steps will walk you through making the best, most bubbly sourdough starter!